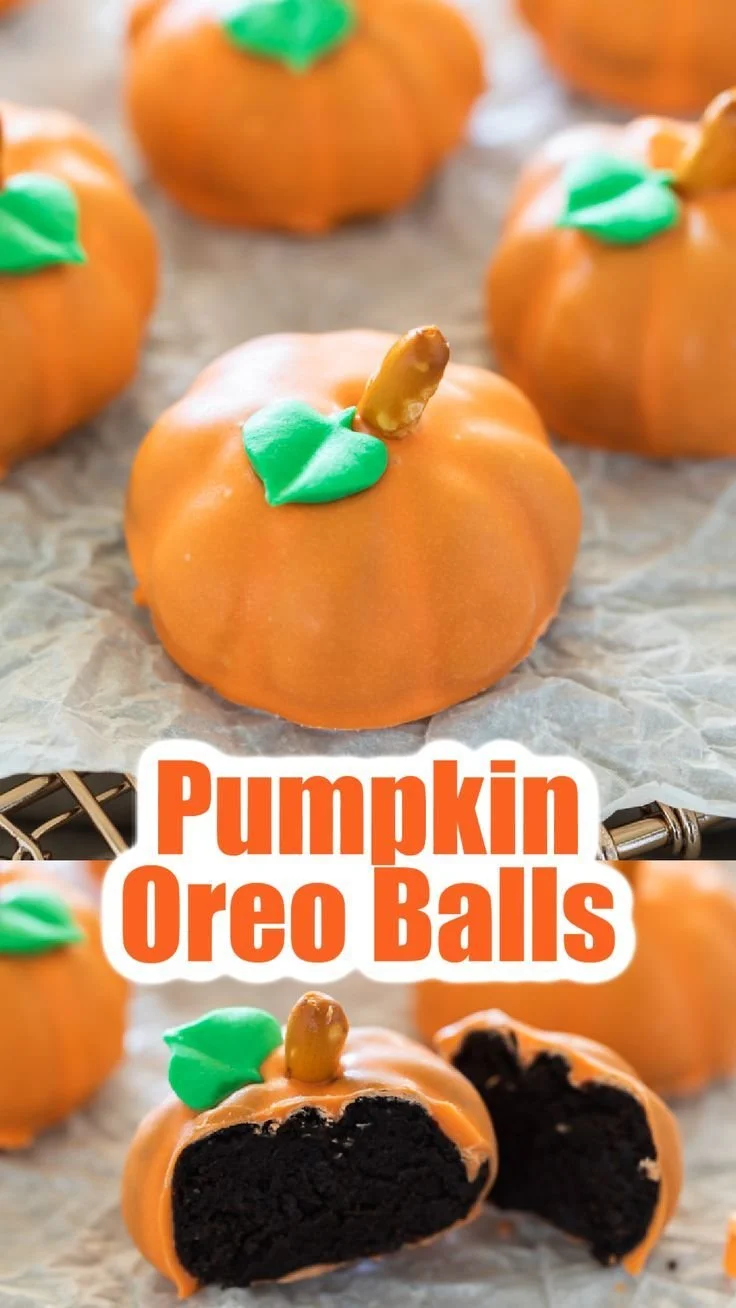
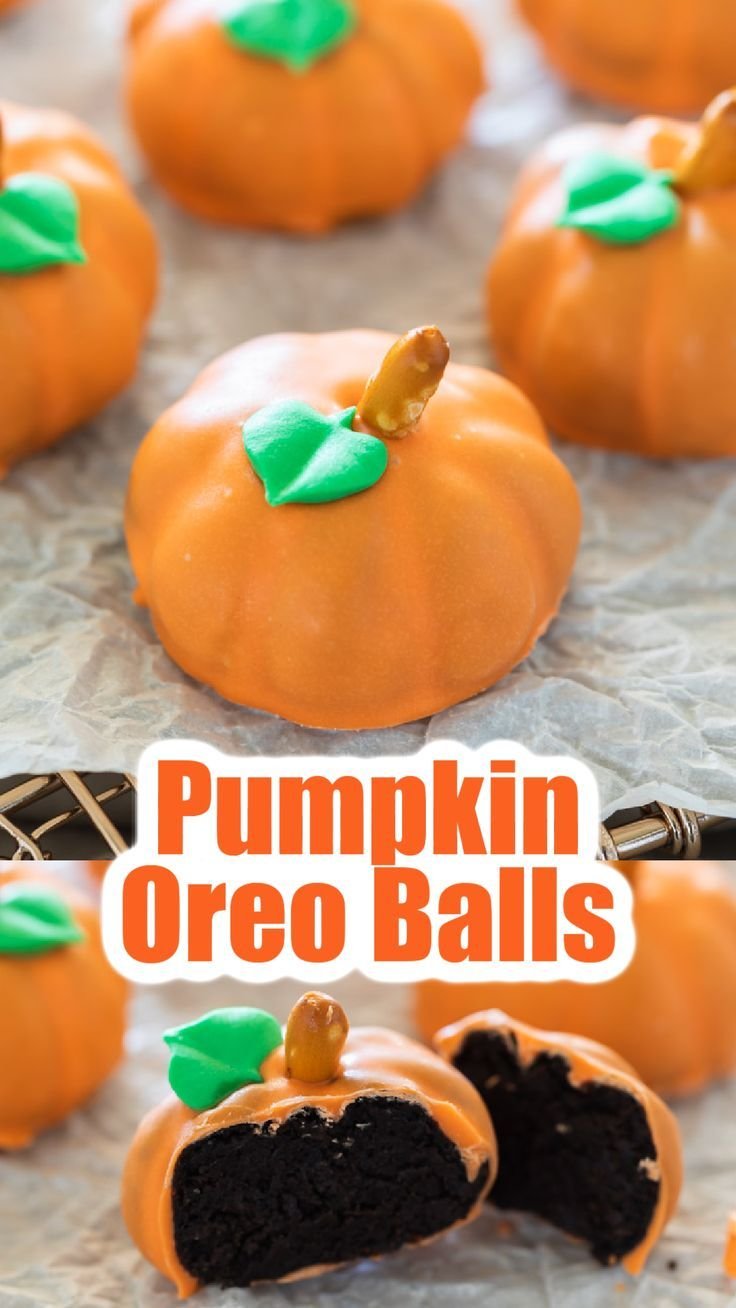
Pumpkin Oreo Balls are the perfect treat to celebrate fall or Halloween. This no-bake recipe combines the beloved flavors of Oreo cookies and cream cheese, shaped into fun pumpkin forms that are delightful to look at and even better to eat. They are quick to prepare and a fantastic addition to any seasonal gathering, making it easy to share joy and deliciousness.
Why You’ll Love Pumpkin Oreo Balls
- Easy to Make: This no-bake recipe requires minimal effort, making it perfect for beginners or when you’re short on time.
- Fun for All Ages: Shaping the Oreo mixture into pumpkin forms can be a fun activity for kids and adults alike, making it a great family project.
- Rich and Flavorful: The combination of Oreo cookies and cream cheese creates a rich, creamy texture that’s hard to resist.
- Perfect for Fall Celebrations: The vibrant orange color and pumpkin shape make these treats ideal for Halloween parties or Thanksgiving gatherings.
- Customizable: You can get creative with decorations, making each batch unique with different sprinkles or toppings.
Recipe Overview
- Prep Time: 30 minutes
- Cook Time: 0 minutes (no baking required)
- Total Time: 30 minutes
- Servings: 20 pumpkin balls
- Difficulty Level: Easy
Ingredients You’ll Need for Pumpkin Oreo Balls
- Oreo Cookies: 1 package (about 15.35 oz) – These are the base of the recipe, providing a rich chocolate flavor.
- Cream Cheese: 8 oz, softened – This creates a creamy texture that binds the cookie crumbs together.
- Orange Candy Melts: 10 oz – Used for coating the pumpkin-shaped balls, giving them a vibrant color.
- Chocolate Chips: ½ cup – For making the pumpkin stems; semi-sweet chocolate works best.
- Green Sprinkles: To decorate – These add a festive touch to your pumpkin balls.
here
How to Make Pumpkin Oreo Balls
- Crush the Oreos: Place the Oreo cookies in a food processor and pulse until you have fine crumbs. If you don’t have a food processor, you can place the cookies in a zip-top bag and crush them with a rolling pin.
- Mix Ingredients: In a mixing bowl, combine the crushed Oreo cookies with softened cream cheese. Mix until the mixture is well-combined and forms a dough-like consistency.
- Shape the Pumpkins: Scoop out small portions of the mixture and roll them into balls. Then, gently flatten the tops and pinch the sides to form a pumpkin shape. Place them on a parchment-lined baking sheet.
- Melt the Candy Melts: Place the orange candy melts in a microwave-safe bowl. Microwave in 30-second intervals, stirring in between, until fully melted and smooth.
- Coat the Pumpkins: Dip each pumpkin-shaped ball into the melted orange candy, ensuring it is fully covered. Carefully place them back on the parchment paper to set.
- Add the Finishing Touches: Once coated, immediately press a chocolate chip into the top of each pumpkin for the stem and sprinkle with green sprinkles for decoration before the coating hardens.
Tips for Success
- Use Softened Cream Cheese: Make sure your cream cheese is at room temperature for easy mixing. This will help achieve a smooth consistency.
- Crushing Cookies: Ensure the cookies are finely crushed to avoid chunks that may make shaping difficult.
- Temperature for Candy Melts: Don’t overheat the candy melts; melt them gently to prevent them from becoming too thick or grainy.
- Chilling the Mixture: If the mixture is too soft to shape, refrigerate it for about 15-20 minutes before rolling into balls.
- Customize Toppings: Feel free to use different colored candy melts or decorations based on your theme or preference.
Easy Variations
- Chocolate Dipped: Instead of using orange candy melts, dip the pumpkin balls in melted chocolate for a richer flavor.
- Nutty Twist: Add chopped nuts or crushed pretzels to the mixture for added crunch and flavor complexity.
- Spiced Variation: Mix in a little pumpkin spice or cinnamon with the cream cheese for a warm fall flavor.
- Coconut Flakes: Roll the finished pumpkin balls in shredded coconut for a textured, snow-like appearance.
- Peanut Butter Addition: Substitute half of the cream cheese with peanut butter for a different twist!
What to Serve with Pumpkin Oreo Balls
- Hot Chocolate: The rich flavors of chocolate and cream pair beautifully with the sweet pumpkin balls.
- Apple Cider: Serve warm apple cider alongside for an inviting autumn beverage duo.
- Cinnamon Rolls: These sweet rolls complement the flavors in the pumpkin balls and add a delightful comfort.
- Charcuterie Board: Include them on a fall-themed charcuterie board with cheeses, fruits, and nuts for a festive treat.
- Ice Cream: Serve with a scoop of vanilla or cinnamon ice cream for an indulgent dessert option.
Storage and Reheating
- Refrigerator Storage: Store the Pumpkin Oreo Balls in an airtight container in the refrigerator for up to one week.
- Freezer Storage: You can freeze them for up to three months. Lay them on a baking sheet to freeze individually, then transfer to a freezer-safe container or bag.
- Reheating Method: If you want to soften them slightly, let them sit at room temperature for about 10 minutes before serving.
- Preserving Texture: For the best texture, avoid reheating in the microwave after they have been chilled or frozen, as this can alter their structure.
Common Mistakes to Avoid
- Using Cold Cream Cheese: Failing to bring cream cheese to room temperature can lead to lumps in the mixture.
- Not Crushing Cookies Finely: Leaving large chunks can make shaping difficult and affect the texture of your balls.
- Overheating Candy Melts: Microwaving candy melts too long can make them hard to work with.
- Not Letting Coating Set: Allow the coating time to fully harden before transferring to prevent sticking or losing shape.
- Skipping the Sprinkles: Forgetting the decorations can make your treats less festive, so don’t skip this fun final step!
Pumpkin Oreo Balls: Background & Cultural Inspiration
Pumpkin desserts have long been a staple in autumn traditions, especially in the U.S. and Canada during the fall harvest. The combination of pumpkin and spices evokes feelings of warmth and cheer, making it a favorite during Halloween and Thanksgiving. Oreo’s iconic flavor offers a modern twist to classic pumpkin recipes, allowing for creativity and fun in both preparation and presentation. These pumpkin balls embody the spirit of togetherness, as they’re perfect for sharing at gatherings with friends and family. Their playful shape and rich taste symbolize the joy of the season, reminding us all to embrace the simpler pleasures in life.
Frequently Asked Questions
Can I use gluten-free Oreos?
Yes, gluten-free Oreos are available and can be used for a gluten-free version of this recipe.
How long do these keep in the fridge?
They will stay fresh in the refrigerator for about one week when stored in an airtight container.
Can I prepare these in advance?
Absolutely! You can make these pumpkin balls a few days ahead of your event. They store well in the fridge.
Can I use different colors for the coating?
Yes! Feel free to use any color of candy melts to match your event or just to get creative!
What can I do if the mixture is too soft to shape?
If your mixture is too soft, refrigerate it for 15-20 minutes until it firms up for easier handling.
Final Thoughts
Pumpkin Oreo Balls offer a delightful blend of flavors and a fun, festive appearance that everyone will love. They are simple to make and perfect for adding a sweet touch to your autumn gatherings. Whether it’s for a Halloween party or a cozy fall get-together, this recipe is sure to bring smiles and sweetness to your table. Give it a try, and enjoy a delicious and playful treat!