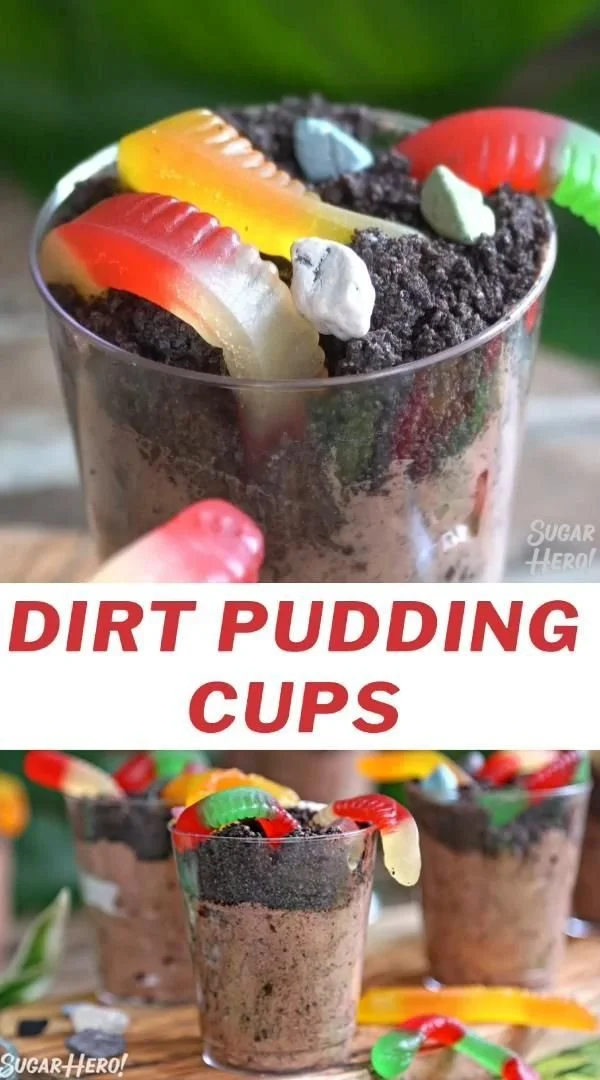
Making Dirt Pudding Cups is a fun and nostalgic treat that will transport you back to childhood. This delightful dessert combines creamy chocolate pudding, crunchy cookies, and a touch of whimsy, making it a perfect choice for kids and adults alike. Designed for easy assembly, this recipe is not only delicious but visually appealing, ideal for gatherings or a fun family dessert night.
Why You’ll Love Dirt Pudding Cups
- Fun Presentation: Layering the pudding in cups creates a visually appealing dessert that’s perfect for parties. The “dirt” effect is always a hit with both kids and adults.
- No-Bake Convenience: There’s no baking involved, making it a quick and easy recipe that anyone can master. Just mix, layer, and chill!
- Customizable Ingredients: You can easily adapt the recipe to suit your preferences. Swap in different cookies, or add toppings like gummy worms for a whimsical touch.
- Family-Friendly: This dessert is a great way to involve kids in the kitchen. They can help crush the cookies and assemble the layers, making it a perfect family activity.
- Perfect for Any Occasion: Whether it’s a birthday party, a barbecue, or just a fun dessert at home, Dirt Pudding Cups fit the bill for any gathering.
Recipe Overview
- Prep Time: 30 minutes
- Cook Time: 0 minutes (Chill time: 2 hours)
- Total Time: 2 hours 30 minutes
- Servings: 6 to 8 servings
- Difficulty Level: Easy
Ingredients You’ll Need for Dirt Pudding Cups
- Chocolate Pudding: 1 box (3.9 oz) instant chocolate pudding mix
- Note: You can use homemade pudding if preferred.
- Milk: 2 cups (whole or 2% for creaminess)
- Whipped Topping: 1 container (8 oz) whipped topping (like Cool Whip), thawed
- Chocolate Sandwich Cookies: 1 package (about 15 cookies), crushed into fine crumbs
- Substitute: Oreos are a popular choice, but any chocolate cookie will work.
- Gummy Worms (optional): For topping to add a fun touch
How to Make Dirt Pudding Cups
-
Prepare the Pudding: In a large mixing bowl, combine the instant chocolate pudding mix and milk. Whisk together for about 2 minutes until smooth. Let it sit for 5 minutes to thicken slightly.
-
Fold in Whipped Topping: Gently fold the thawed whipped topping into the pudding mixture using a spatula. Be careful to maintain the airy texture.
-
Crush the Cookies: Place the chocolate sandwich cookies in a resealable plastic bag and crush them into fine crumbs using a rolling pin or your hands. You want a texture that resembles dirt.
-
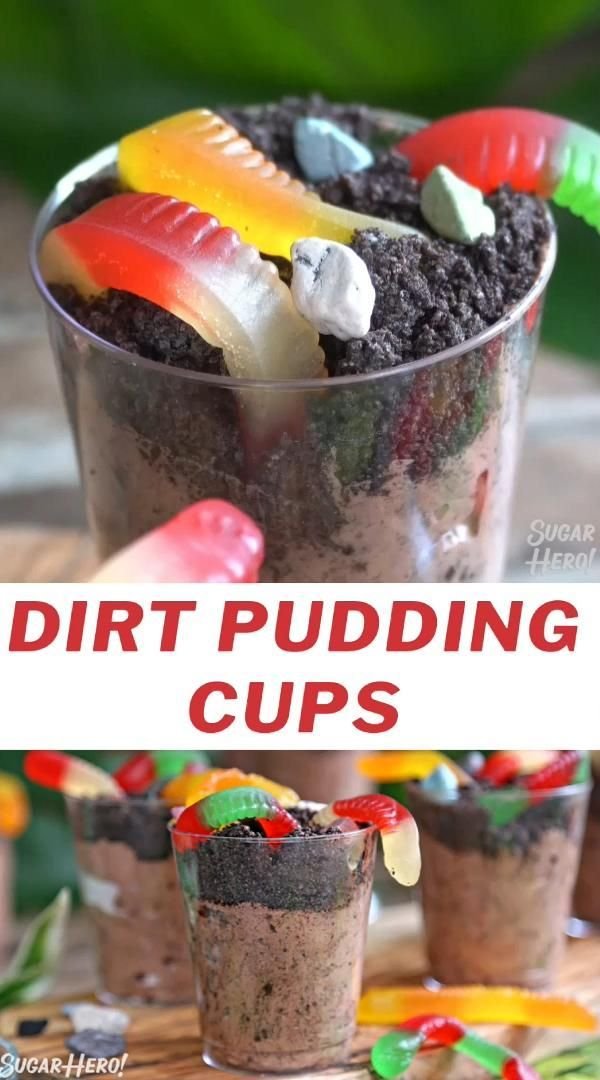
Layer the Ingredients: In serving cups or dessert bowls, start by adding a layer of the chocolate pudding mixture, then sprinkle a layer of cookie crumbs on top. Repeat this process until the cups are filled, finishing with a layer of cookie crumbs.
-
Chill the Dessert: Cover the cups with plastic wrap and refrigerate for at least 2 hours to allow the flavors to meld and the pudding to set.
-
Add Toppings: Before serving, arrange gummy worms atop the dessert for a fun garnish. You can also add a sprinkle of extra cookie crumbs for added texture.
Tips for Success
- Ensure Pudding Sets: Allow enough time for the pudding to set properly in the refrigerator. This will help maintain its texture when you serve it.
- Crush Cookies Well: To avoid large chunks, ensure the cookies are finely crushed for the best layered appearance and texture.
- Experiment with Flavors: Consider using different pudding flavors, like vanilla or butterscotch, for unique variations.
- Use Clear Cups: Clear cups or jars showcase the layers and make your Dirt Pudding Cups visually appealing.
- Make Ahead: This dessert can be made a day in advance and stored in the fridge until ready to serve.
Easy Variations
- Different Cookies: Use peanut butter or mint-flavored sandwich cookies for a twist on the traditional chocolate.
- Fruit Addition: Layer in some fresh strawberries or raspberries for a fruity contrast.
- Nutty Crunch: Add crushed nuts between layers for a bit of crunch and flavor complexity.
- Chocolate Layering: Alternate layers of chocolate pudding with layers of vanilla pudding for a striped effect.
- Vegan Version: Use dairy-free pudding mix and a non-dairy whipped topping for a vegan-friendly dessert.
What to Serve with Dirt Pudding Cups
- Fruit Salad: A refreshing fruit salad balances the sweetness of the dessert and adds a healthy touch.
- Ice Cream: Pair with a scoop of vanilla or chocolate ice cream for an indulgent treat.
- Mini Cupcakes: Little cupcakes complement the pudding cups, perfect for dessert tables.
- Chocolate-Dipped Fruit: Strawberries or bananas dipped in chocolate go well with the chocolate flavors of the dessert.
- Milk: A glass of cold milk is a classic, refreshing pairing that enhances the chocolatey goodness.
Storage and Reheating
- Refrigerator Storage: Store leftovers in the refrigerator covered with plastic wrap for up to 3 days. The cookies may lose some crunch over time but will still taste great.
- Freezer Storage: Avoid freezing as the texture of the pudding and whipped topping may change upon thawing.
- Best Reheating Method: There’s no need to reheat this dessert; serve it chilled straight from the fridge.
- Meal Prep Note: Dirt Pudding Cups are great for meal prep as they can be made ahead of time and enjoyed throughout the week.
Common Mistakes to Avoid
- Overmixing the Pudding: Overwhisking can lead to a grainy texture, so whisk until just combined.
- Not Chilling Long Enough: Skipping the chilling step can result in a runny dessert; be patient!
- Using Stale Cookies: Fresh cookies ensure the best flavor and texture; check your cookie expiration before use.
- Skipping Layering: Layering is key for presentation; don’t skip this step for the best visual impact.
- Unbalanced Layers: Ensure equal layering of pudding and cookies so every bite is delightful.
Dirt Pudding Cups: Background & Cultural Inspiration
Dirt Pudding Cups have become a beloved dessert in American culture, especially among children. Often served at birthday parties, school events, and family gatherings, this whimsical treat evokes memories of childhood fun and creativity in the kitchen. Its playful presentation, mimicking a garden with layers of chocolate "dirt" and gummy worms, makes it a hit among young and old alike. The dessert often emphasizes sharing, family bonding, and the joy of cooking together, making it a staple in many households.
Frequently Asked Questions
Can I make this dessert dairy-free?
Yes, you can use dairy-free pudding mix and non-dairy whipped topping as substitutes.
How long can I store Dirt Pudding Cups?
These desserts can be stored in the refrigerator for up to 3 days, though optimal freshness is within the first day or two.
Can I use homemade pudding instead of instant?
Absolutely! Homemade pudding will add richness, although you’ll want to ensure it cools before layering.
How can I make this dessert more chocolaty?
For an extra chocolate boost, consider drizzling chocolate syrup on top or adding chocolate chips between layers.
Is it possible to prepare this dessert the night before?
Yes, Dirt Pudding Cups are excellent for make-ahead prep. Just store them in the refrigerator and enjoy them the next day.
Final Thoughts
Dirt Pudding Cups are not only a delightful dessert, but they’re also a canvas for creativity and family fun. With a simple assembly process and endless possibilities for customization, this recipe is worthy of a spot in your dessert repertoire. Whether for a lively celebration or a quiet night in, these treats are sure to please everyone and bring a smile to your face. Enjoy the fun of making and sharing this whimsical dessert with your loved ones!