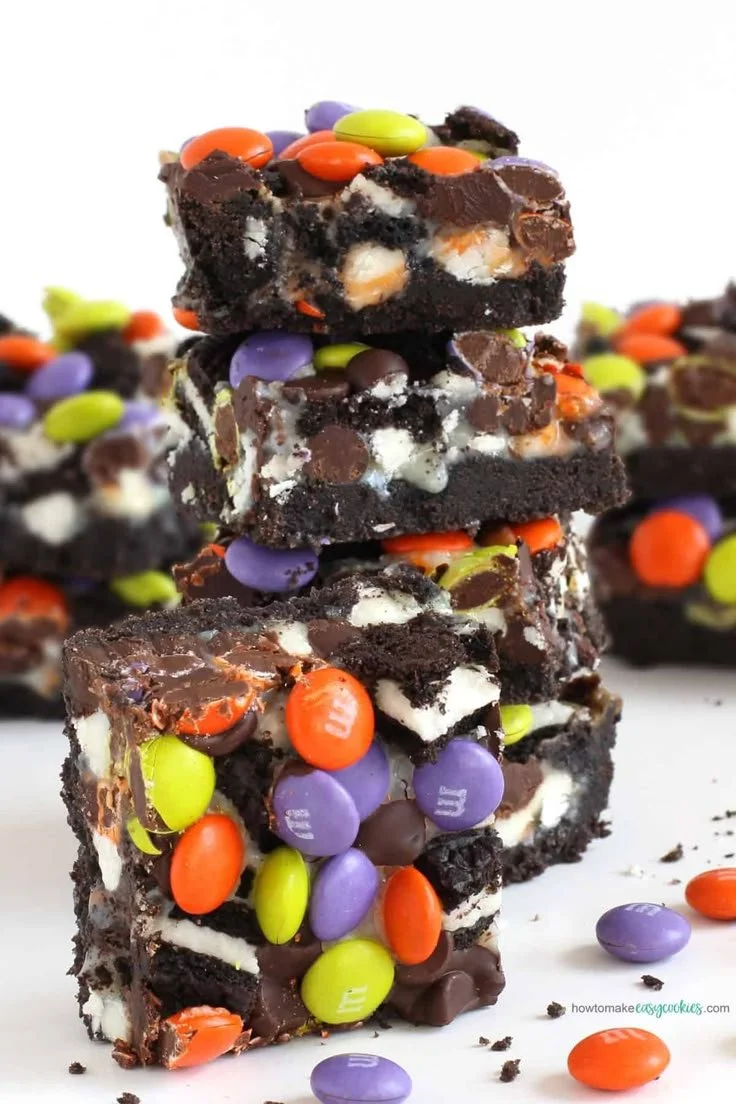
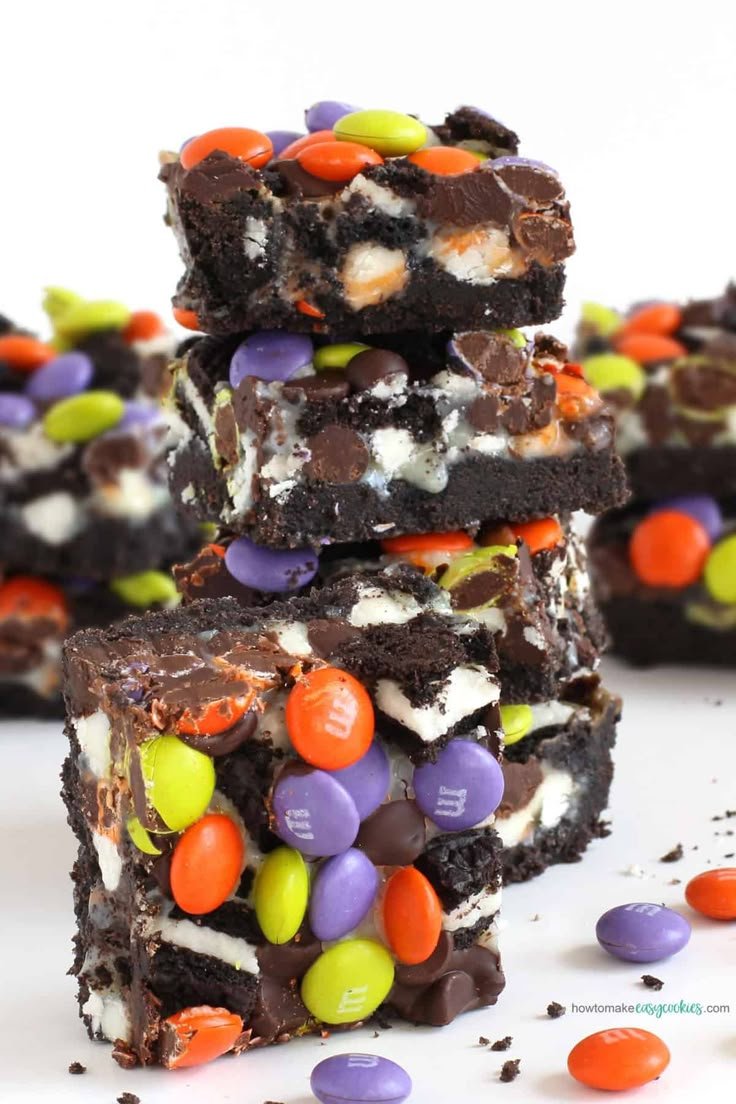
Halloween Magic Bars are a delightful treat that combine the classic flavors of chocolate, cookies, and sweetened condensed milk into a gooey, irresistible dessert. Perfect for sharing at Halloween parties or enjoying with friends and family, these bars are easy to make and look stunning with their colorful toppings. You’ll want to whip up a batch to impress your loved ones!
Why You’ll Love Halloween Magic Bars
- Easy to Make: With just a few simple steps, you can have a delicious dessert ready to bake. This recipe is beginner-friendly, making it perfect for home cooks of all skill levels.
- Customizable: While this recipe features a fun Halloween theme, you can easily change the toppings to match any occasion, making it a versatile dessert throughout the year.
- Decadent Layers: Each bite offers a satisfying mix of textures, from the crunchy cookie crust to the melty chocolate and sugary toppings. It’s a treat that’s both comforting and indulgent.
- Great for Sharing: These magic bars cut into perfect squares, making them ideal for parties, bake sales, or family gatherings where everyone can enjoy a piece.
- Festive Presentation: The visual appeal of these bars, especially with the Halloween M&Ms, adds a festive touch that enhances any holiday spread.
Recipe Overview
- Prep Time: 15 minutes
- Cook Time: 30 minutes
- Total Time: 45 minutes
- Servings: 25 squares
- Difficulty Level: Easy
Ingredients You’ll Need for Halloween Magic Bars
- 46 OREO Cookies, divided
- 1/2 cup (1 stick) butter, melted
- 14 ounces (1 can) sweetened condensed milk
- 3 ounces (1/2 cup) white chocolate chips
- 9 ounces (1 1/2 cups) semi-sweet chocolate chips, divided
- 10 ounces (1 bag) Halloween Ghouls Mix M&Ms
Ingredient Notes:
- OREO Cookies: These serve as the base for the crust. You can use any flavor of OREO for variation.
- Butter: The melted butter helps bind the cookie crumbs together for a firm crust.
- Sweetened Condensed Milk: This ingredient adds a rich sweetness and binds everything together.
- White Chocolate Chips: These provide a contrasting flavor and creamy texture.
- Semi-sweet Chocolate Chips: Both for melting and decoration, semi-sweet chocolate balances the sweetness.
- Halloween M&Ms: A fun seasonal treat that adds color and a bit of crunch. You can substitute other themed candies or chocolate chips if desired.
How to Make Halloween Magic Bars
-
Prepare the Pan
Line a 9×13-inch baking pan with non-stick tin foil or regular aluminum foil greased with baking spray. This will ensure easy removal of the bars later. -
Preheat the Oven
Preheat your oven to 350 degrees Fahrenheit (178° C). -
Crush the Cookies
Crush 34 of the OREO Cookies into fine crumbs using a food processor. Alternatively, place them in a large zip-top bag and smash them using a meat mallet, rolling pin, or the back of a pan. -
Mix the Crust
Stir together the crushed cookie crumbs and melted butter until fully combined. -
Press into the Pan
Press the cookie mixture into an even layer in the lined pan, ensuring it covers the bottom fully. -
Add the Sweetened Condensed Milk
Spread the sweetened condensed milk evenly over the cookie crust. -
Layer the Chocolate Chips
Sprinkle 1/2 cup of white chocolate chips over the condensed milk. Then, sprinkle 3/4 cup of semi-sweet chocolate chips over the white chips. -
Add the Remaining Cookies
Break the remaining 12 OREO Cookies into small pieces and arrange them evenly over the top of the chocolate chips. -
Bake
Bake for 22 minutes until the sweetened condensed milk is caramelized around the edges of the pan. -
Finish Baking
Remove the pan from the oven and sprinkle the remaining semi-sweet chocolate chips and the Halloween Ghouls Mix M&Ms over the top. Return the pan to the oven for 6-8 minutes to finish baking and allow the chocolate chips to melt slightly. -
Cool and Cut
Allow the bars to cool for at least 2 hours, then cut into 25 squares.
Tips for Success
- Crust Consistency: Ensure the cookie crumbs and melted butter are mixed well to prevent a crumbly crust.
- Don’t Overbake: Keep an eye on the bars to prevent them from drying out. They should look slightly underbaked in the center, as they will continue to firm up as they cool.
- Let Cool Completely: Allow the bars to cool for at least 2 hours before cutting to ensure clean squares.
- Use Quality Ingredients: High-quality chocolate chips will improve the flavor and smoothness of the melted chocolate layer.
Easy Variations
- Nutty Add-Ins: Add chopped nuts like walnuts or pecans to the chocolate layer for a crunchy texture.
- Dried Fruit: Mix in some dried cranberries or raisins for a sweet and tangy twist.
- Coconut Flakes: Sprinkle shredded coconut over the top before baking for a tropical flavor.
- Use Different Candies: Swap Halloween M&Ms for regular or holiday-themed candies like Peanut Butter M&Ms or chocolate-covered pretzels.
What to Serve with Halloween Magic Bars
- Vanilla Ice Cream: A scoop of vanilla ice cream complements the bars’ richness perfectly.
- Pumpkin Spice Latte: Enjoy these bars with a cozy pumpkin spice latte for a festive treat.
- Milk: Classic and simple, milk is the ultimate pairing for anything chocolatey.
- Coffee: A cup of coffee balances the sweetness and enhances the chocolate flavor.
Storage and Reheating
- Refrigerator: Store any leftover magic bars in an airtight container in the refrigerator for up to one week.
- Freezer: For longer storage, freeze the bars in a single layer in a freezer-safe container for up to 3 months. Thaw in the refrigerator before serving.
- Reheating: If desired, reheat squares in the microwave for about 10-15 seconds to enjoy warm.
Common Mistakes to Avoid
- Not Greasing the Pan: Failing to grease the pan could lead to the bars sticking, making it hard to remove them afterward.
- Overmixing the Crust: Mixing the cookie crust too much can result in a tough base instead of a tender one.
- Skipping Cooling Time: Cutting the bars before they have cooled completely can cause them to crumble, so be patient.
Halloween Magic Bars: Background & Cultural Inspiration
Magic bars are fun desserts that have been popular in many home kitchens. Originating in the mid-20th century, these layered treats are often made with a cookie crust, sweetened condensed milk, and various toppings. The addition of seasonal themes, like Halloween, gives them a festive twist and makes them perfect for celebrations. The brightly colored candies and textures are visually appealing, which enhances their desirability during Halloween festivities.
Frequently Asked Questions
Can I make these magic bars ahead of time?
Yes, you can prepare these bars a day in advance and store them in the refrigerator. This allows the flavors to meld beautifully.
Can I use a different type of cookies for the crust?
Definitely! Any chocolate cookie will work well, such as chocolate chip cookies or even graham crackers for a different flavor.
How do I store leftovers?
Store leftover magic bars in an airtight container in the refrigerator for up to a week, or freeze them for longer storage.
How can I make these a bit healthier?
Consider using reduced-fat cookie options or sugar-free chocolate chips. You can also add healthy ingredients like nuts or seeds.
What if I don’t have semi-sweet chocolate chips?
You can substitute dark chocolate chips or even milk chocolate chips, depending on your preference.
Final Thoughts
Halloween Magic Bars are a delightful treat that brings joy to any gathering. Their combination of chocolatey goodness, seasonal flair, and ease of preparation makes them a must-try dessert for Halloween. Whether you share them with friends or enjoy them with family, these bars will undoubtedly become a holiday favorite. Don’t hesitate to make them for your next event—you’ll be glad you did!