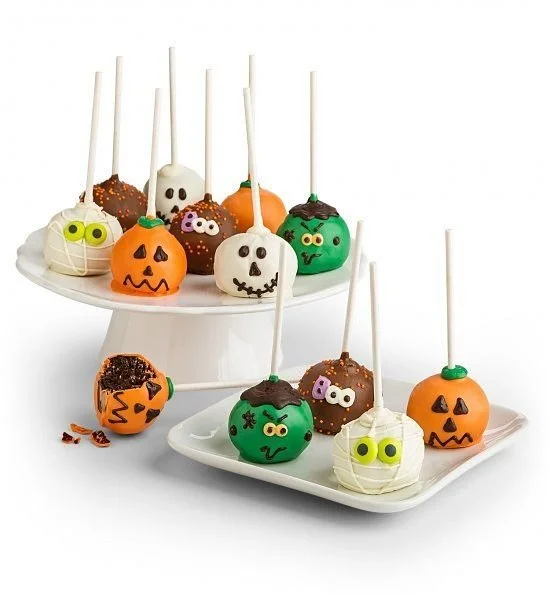
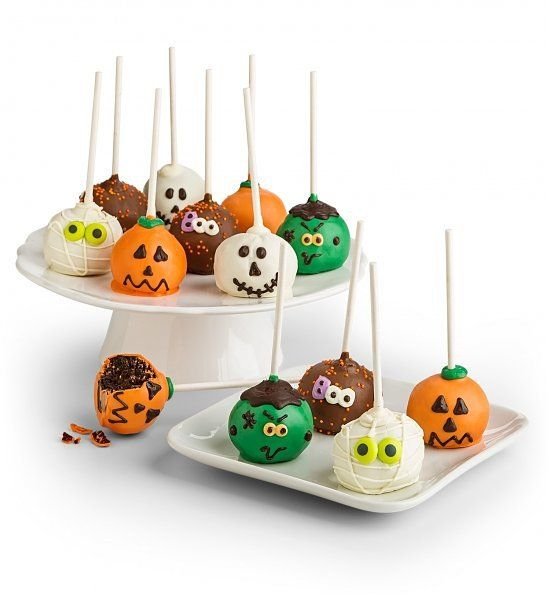
Making delicious and fun Cake Pops is a delightful way to celebrate special occasions or simply enjoy a sweet treat at home. This easy Cake Pops recipe is perfect for beginners, requiring minimal ingredients while still providing a fun and creative experience. No need for advanced baking skills—just follow the steps, and you’ll be rewarded with charming cake pops that everyone will love.
Why You’ll Love Cake Pops
- Easy to Make: This recipe uses a simple cake mix, making preparation a breeze. Even novice bakers can whip these up with confidence.
- Customizable: You can personalize cake pops with different cake flavors, frostings, and toppings to suit any occasion or preference.
- Perfect for Gatherings: Whether for a birthday, holiday party, or school event, these bite-sized treats are fun to eat and perfect for sharing.
- Delightfully Fun: Kids and adults alike enjoy the playful presentation of cake pops, making them a hit at any gathering.
- No Special Equipment Needed: You don’t need fancy tools or equipment; a few basic kitchen items will do the trick.
Recipe Overview
- Prep Time: 20 minutes
- Cook Time: 30 minutes (plus chill time)
- Total Time: 1 hour (including chill time)
- Servings: About 20 cake pops
- Difficulty Level: Easy
Ingredients You’ll Need for Cake Pops
- 1 Box of Cake Mix: Choose your favorite flavor for the cake base.
- 1 Cup Frosting: Use a complementary flavor to your cake for added moisture and flavor.
- 1 lb Chocolate: This can be candy melts or melting chocolate for the coating.
- Lollipop Sticks: Essential for holding the cake pops.
- Decorations: Such as sprinkles, edible eyes, or other toppings for a creative touch.
How to Make Cake Pops
- Bake the Cake: Prepare the cake mix according to the package instructions. Let it cool completely after baking.
- Crumble the Cake: After cooling, crumble the cake into a large bowl until there are no large pieces.
- Mix with Frosting: Add the frosting to the crumbled cake and mix well until fully combined. The mixture should be moist but not overly sticky.
- Form Balls: Roll the mixture into small balls, about 1 inch in diameter, and place them on a baking sheet. Chill in the refrigerator for about 30 minutes.
- Melt the Chocolate: While the cake balls are chilling, melt the chocolate according to package instructions until smooth.
- Prepare the Sticks: Dip the end of each lollipop stick into the melted chocolate and then insert it into a chilled cake ball. This will help the sticks stay in place.
- Dip in Chocolate: Fully coat each cake pop in the melted chocolate, allowing any excess to drip off.
- Add Decorations: While the chocolate is still wet, sprinkle on your desired toppings.
- Let Set: Stand the cake pops upright in a styrofoam block or jar until the chocolate hardens.
Tips for Success
- Cool Completely: Ensure the cake is completely cool before crumbling it; otherwise, the mixture may become too warm and difficult to handle.
- Right Texture: If the mixture feels too dry, add more frosting a little at a time. If too wet, chill it longer before rolling into balls.
- Perfectly Melted Chocolate: Heat the chocolate in short bursts in the microwave or over a double boiler to prevent burning.
- Keep It Cold: Chill the cake balls again after inserting the sticks if they become too soft, making them easier to dip.
- Use Fresh Ingredients: Make sure your frosting and cake mix have not expired for the best flavor.
Easy Variations
- Different Flavors: Experiment with various cake and frosting flavors like lemon cake with cream cheese frosting or chocolate cake with vanilla frosting.
- Add Flavor Extracts: Incorporate vanilla, almond, or mint extract into the cake mixture for added depth.
- Decorative Toppings: Change it up with crushed nuts, coconut flakes, or themed sprinkles for holidays or celebrations.
- Swirl Colors: For a fun visual effect, use colored candy melts or mix different chocolate colors together before dipping.
- Dairy-Free Options: Substitute with dairy-free cake mix and frosting for a healthier alternative.
What to Serve with Cake Pops
- Milkshakes: Chocolate or vanilla milkshakes pair beautifully, catering to the sweet tooth.
- Coffee or Espresso: The rich flavors of coffee complement the sweetness of cake pops perfectly for an afternoon treat.
- Fruit Platters: Fresh fruit offers a refreshing contrast and balances the richness of cake pops.
- Party Punch: A fun and fruity punch can enhance the festive atmosphere during gatherings.
Storage and Reheating
- Refrigerator Storage: Store cake pops in an airtight container in the refrigerator for up to a week.
- Freezer Storage: For longer storage, freeze the cake pops before decorating. Once decorated, they can be kept in the freezer for up to 2 months.
- Best Reheating Method: If chilled, let them sit at room temperature for a few minutes before serving.
- Preserving Texture: For the best quality, it is best to avoid refreezing after they are dipped in chocolate.
Common Mistakes to Avoid
- Not Letting Cake Cool: Avoid mixing or rolling cake balls while the cake is still warm; it affects texture and consistency.
- Too Much Frosting: Adding too much frosting can make the mixture overly wet, making it hard to shape.
- Skipping the Chill: Don’t skip chilling the cake balls before dipping; this can cause them to fall apart in the melted chocolate.
- Not Working Quickly Enough: Chocolate can harden fast, so work quickly when adding decorations to ensure they stick well.
- Neglecting Storage: If stored improperly, they can lose freshness and texture—always use an airtight container.
Cake Pops: Background & Cultural Inspiration
Cake pops have surged in popularity over the last decade, gaining fame for their playful, adorable appearance and versatility. Originally conceived as a way to use leftover cake, these treats combine the joy of cake with convenience. They first gained prominence in bakeries, especially made famous by social media influencers and baking shows. Their small size also makes them a hit for parties, offering a delightful dessert option that eliminates the need for plates and utensils.
Frequently Asked Questions
Can I use a homemade cake instead of a box mix?
Yes, you can use a homemade cake recipe; just ensure it’s fully cooled before crumbling.
How long can I store my cake pops?
You can store cake pops in the refrigerator for about a week or freeze them for up to two months.
What’s the best way to thaw frozen cake pops?
Simply let them sit at room temperature for 15-20 minutes before enjoying them.
Can I make these cake pops gluten-free?
Absolutely! Use a gluten-free cake mix and check the labels of other ingredients to ensure they are gluten-free.
How can I prevent cake pops from cracking?
Make sure the chocolate is at the right temperature and that the cake pops are adequately chilled before dipping.
Final Thoughts
These Cake Pops are not only an enjoyable baking project, but they also result in cute and delicious treats that brighten any occasion. With simple ingredients and straightforward steps, it’s a recipe worth trying. Gather your supplies and get ready to impress friends and family with these delightful sweets that are sure to bring smiles to everyone’s faces. Make sure to get creative with flavors and decorations to truly make them your own!
PrintEasy Cake Pops
This delightful Cake Pops recipe is perfect for celebrations or a sweet treat at home, using minimal ingredients for a fun baking experience.
- Prep Time: 20 minutes
- Cook Time: 30 minutes
- Total Time: 60 minutes
- Yield: 20 cake pops
- Category: Dessert
- Method: Baking
- Cuisine: American
- Diet: Vegetarian
Ingredients
- 1 box of cake mix (your favorite flavor)
- 1 cup frosting (complementary flavor)
- 1 lb chocolate (candy melts or melting chocolate)
- Lollipop sticks
- Decorations (sprinkles, edible eyes, etc.)
Instructions
- Bake the cake: Prepare the cake mix according to the package instructions. Let it cool completely after baking.
- Crumble the cake: After cooling, crumble the cake into a large bowl until there are no large pieces.
- Mix with frosting: Add the frosting to the crumbled cake and mix well until fully combined.
- Form balls: Roll the mixture into small balls, about 1 inch in diameter, and chill in the refrigerator for 30 minutes.
- Melt the chocolate: Melt the chocolate according to package instructions until smooth.
- Prepare the sticks: Dip the end of each lollipop stick into melted chocolate and insert it into a chilled cake ball.
- Dip in chocolate: Fully coat each cake pop in the melted chocolate and allow excess to drip off.
- Add decorations: While the chocolate is still wet, sprinkle on desired toppings.
- Let set: Stand the cake pops upright in a styrofoam block or jar until the chocolate hardens.
Notes
Ensure the cake is completely cool before crumbling. Adjust frosting amount based on texture.