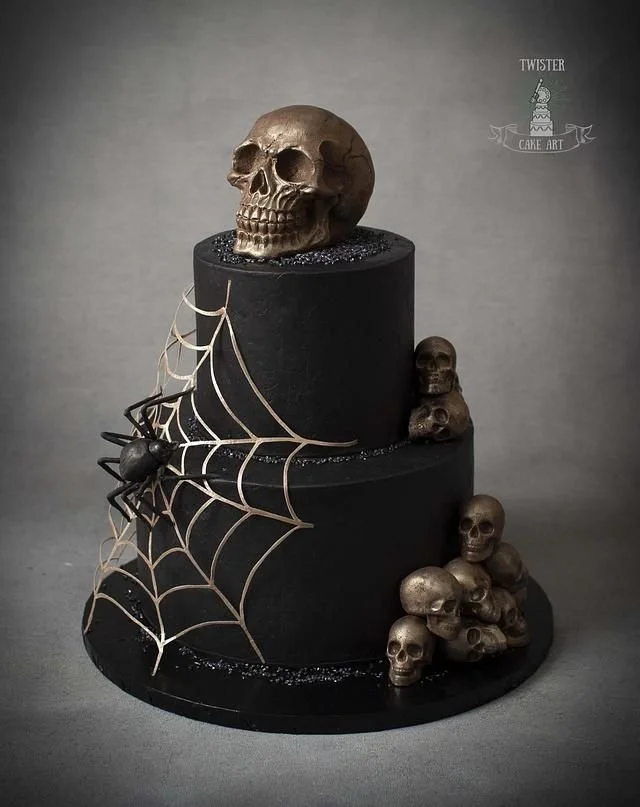
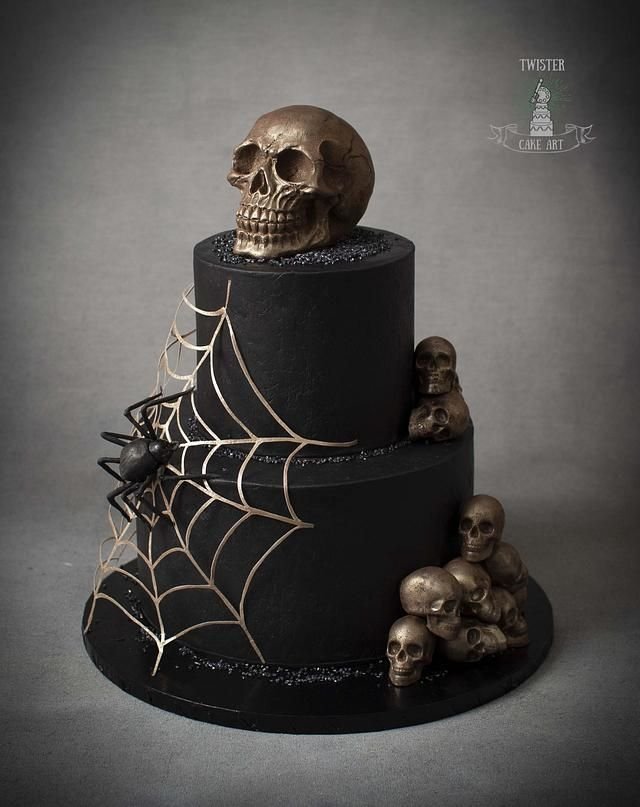
The Spider Nest cake is a festive and delightful treat that captures the spooky spirit of Halloween while being easy to make. Layered with rich flavors and decorated with fun candy, this cake is perfect for parties, gatherings, or just a fun family dessert. With its moist texture and creative presentation, it’s a recipe you’ll want to revisit every fall.
Why You’ll Love Spider Nest Cake
- Simple Ingredients: Made with pantry staples, this cake is cost-effective and straightforward to prepare, making it perfect for beginner bakers.
- Moist and Flavorful: The combination of cocoa and boiling water creates a rich, moist cake that satisfies chocolate lovers while keeping it light.
- Fun Decorating: The Halloween-themed decorations allow for creativity, making baking a fun activity for kids and adults alike.
- Perfect for Occasions: This cake is not just delicious; its eye-catching design makes it a standout dessert for Halloween parties or any festive gathering.
- Easy to Customize: With various frosting and decoration options, you can easily tweak the design to suit your theme or personal preferences.
Recipe Overview
- Prep Time: 20 minutes
- Cook Time: 30-35 minutes
- Total Time: 1 hour
- Servings: 12
- Difficulty Level: Easy
Ingredients You’ll Need for Spider Nest Cake
To make this delightful Spider Nest cake, you’ll need the following ingredients:
-
Dry Ingredients:
- 2 cups all-purpose flour
- 1 ½ cups granulated sugar
- ½ cup unsweetened cocoa powder
- 1 ½ teaspoons baking powder
- 1 ½ teaspoons baking soda
- 1 teaspoon salt
-
Wet Ingredients:
- 2 large eggs
- 1 cup milk
- ½ cup vegetable oil
- 2 teaspoons vanilla extract
- 1 cup boiling water
-
Decorative Elements:
- Food coloring (orange, green, purple, or black for decoration)
- Frosting (chocolate or vanilla for decoration)
- Candy decorations (like gummy worms, spider candies, etc.)
How to Make Spider Nest Cake
Follow these simple steps to create your Spider Nest cake:
-
Preheat the Oven
Preheat your oven to 350°F (175°C) and grease and flour two 9-inch round cake pans to ensure easy release after baking. -
Combine Dry Ingredients
In a large mixing bowl, whisk together the flour, sugar, cocoa powder, baking powder, baking soda, and salt until evenly blended. -
Mix Wet Ingredients
Add the eggs, milk, vegetable oil, and vanilla extract to the dry ingredients. Mix everything together until just combined. -
Incorporate Boiling Water
Carefully stir in the boiling water. The batter will be thin, which is normal and helps create a moist cake. -
pour into Pans
Pour the batter evenly into the prepared cake pans. -
Bake the Cakes
Bake the cakes in the preheated oven for about 30-35 minutes, or until a toothpick inserted into the center comes out clean. -
Cool the Cakes
Allow the cakes to cool in the pans for about 10 minutes before transferring them to a wire rack to cool completely. -
Frost the Cakes
Once the cakes are fully cooled, frost them with your choice of chocolate or vanilla frosting. -
Decorate Creatively
Decorate the cake with your selected food coloring and Halloween-themed candies to create a spooky appearance. Enjoy your festive Spider Nest cake!
Tips for Success
- Ensure accurate measuring of ingredients to avoid any discrepancies in texture.
- Don’t skip the cooling stage, as frosted cakes need to be cool to prevent the frosting from melting.
- When pouring boiling water into the batter, mix slowly to avoid splashing.
- Experiment with different candy decorations to suit your Halloween theme.
Easy Variations
- Cupcake Version: Turn this cake into cupcakes by dividing the batter among cupcake liners and adjusting bake time to 15-20 minutes.
- Gluten-Free Option: Substitute all-purpose flour with a gluten-free flour blend for a gluten-free take.
- Different Flavors: Add a teaspoon of peppermint extract to the wet ingredients for a minty variation.
- Layered Frosting: Create a marbled effect by layering both chocolate and vanilla frosting.
- Healthy Twist: Use unsweetened applesauce in place of oil for a reduced-fat version.
What to Serve with Spider Nest Cake
- Vanilla Ice Cream: The creamy texture complements the rich chocolate flavor.
- Whipped Cream: A dollop on top enhances the cake’s sweetness.
- Fresh Berries: Raspberries or strawberries add freshness and tartness to balance the sweetness.
- Chocolate Drizzle: A drizzle of melted chocolate can elevate the dessert and add an indulgent touch.
Storage and Reheating
- Refrigerator Storage: Keep leftover cake in an airtight container in the fridge for up to 5 days.
- Freezer Storage: Wrap slices in plastic wrap and place them in a freezer-safe bag for up to three months.
- Reheat Method: To reheat, thaw slices in the fridge overnight and warm in the microwave for about 10-15 seconds, being careful not to overheat to maintain texture.
- Meal Prep Note: This cake can be made a day in advance, allowing the flavors to meld nicely.
Common Mistakes to Avoid
- Overmixing the Batter: This can lead to a dense cake, so mix until just combined.
- Skipping the Greasing Step: Ensure the pans are properly greased to avoid sticking.
- Underbaking: For the best texture, make sure the cakes are baked until a toothpick comes out clean.
Spider Nest Cake: Background & Cultural Inspiration
Spider Nest cake is a modern take on traditional festive desserts, often enjoyed during Halloween in many cultures. Its vibrant decorations and whimsical design cater to the playful spirit of the holiday. Cakes themed around spooky or fantastical elements are common, as they engage families and children in cooking activities. This recipe highlights creativity, allowing bakers to express personal styles while celebrating a fun holiday that revolves around community and sharing.
Frequently Asked Questions
Can I make Spider Nest Cake ahead of time?
Yes, you can bake the cakes a day in advance. Just store them in an airtight container after they have cooled completely.
What kind of frosting works best?
Both chocolate and vanilla frostings work wonderfully with the rich flavor of the cake. Choose based on your taste preference!
Can I change the food coloring?
Absolutely! Feel free to choose any colors that suit your Halloween theme, or use traditional colors like orange and black.
How do I prevent the cakes from sticking?
Properly grease and flour your cake pans, or use parchment paper at the bottom for extra protection.
Can I use a different type of oil?
Yes, you can substitute vegetable oil with canola oil or melted coconut oil without compromising the flavor or texture.
Final Thoughts
The Spider Nest cake is an enjoyable and creative dessert that’s sure to impress at any gathering. With its simple ingredients and fun decorating options, this recipe is perfect for bakers of all skill levels. So gather your ingredients and get ready to treat your friends and family to a spooktacular delight this Halloween!
PrintSpider Nest Cake

A festive and delightful treat perfect for Halloween, layered with rich flavors and decorated with fun candy.
- Prep Time: 20 minutes
- Cook Time: 35 minutes
- Total Time: 55 minutes
- Yield: 12 servings
- Category: Dessert
- Method: Baking
- Cuisine: American
- Diet: Vegetarian
Ingredients
- 2 cups all-purpose flour
- 1 ½ cups granulated sugar
- ½ cup unsweetened cocoa powder
- 1 ½ teaspoons baking powder
- 1 ½ teaspoons baking soda
- 1 teaspoon salt
- 2 large eggs
- 1 cup milk
- ½ cup vegetable oil
- 2 teaspoons vanilla extract
- 1 cup boiling water
- Food coloring (orange, green, purple, or black for decoration)
- Frosting (chocolate or vanilla for decoration)
- Candy decorations (like gummy worms, spider candies, etc.)
Instructions
- Preheat your oven to 350°F (175°C) and grease and flour two 9-inch round cake pans.
- Combine the flour, sugar, cocoa powder, baking powder, baking soda, and salt in a large mixing bowl.
- Mix in the eggs, milk, vegetable oil, and vanilla extract until just combined.
- Incorporate the boiling water carefully, stirring until well mixed.
- Pour the batter evenly into the prepared cake pans.
- Bake for about 30-35 minutes, or until a toothpick inserted into the center comes out clean.
- Cool the cakes for 10 minutes, then transfer to a wire rack to cool completely.
- Frost the cooled cakes with your choice of chocolate or vanilla frosting.
- Decorate with food coloring and Halloween-themed candies.
Notes
Ensure accurate measuring of ingredients and don’t skip the cooling stage before frosting.