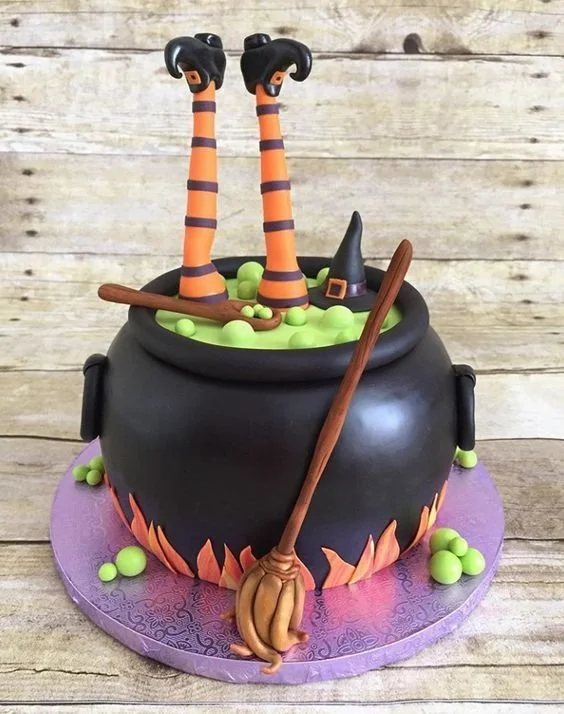
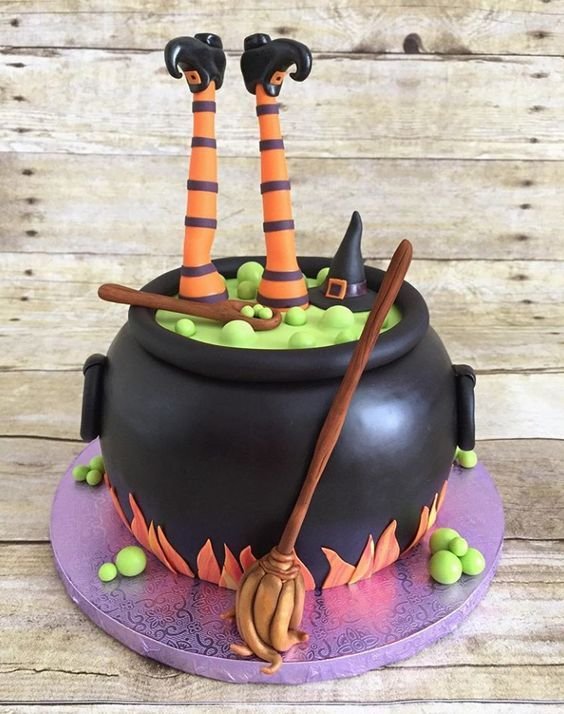
The Halloween Cake is a delightful, whimsical treat that brings a festive touch to any celebration. Not only is it visually stunning, but it’s also simple enough for beginner bakers to master. With layers of cake, colorful frosting, and spooky decorations, this cake is bound to ignite your creativity and impress guests at your next Halloween party.
Why You’ll Love Halloween Cake
- Festive and Fun: This cake makes a perfect centerpiece for any Halloween gathering, adding a touch of seasonal spirit to your table.
- Easy to Customize: You can play with different colors and decorations, making it an excellent project for kids or a fun activity with friends.
- Delicious Layers: With a choice of chocolate and vanilla cake layers, each bite is a balanced mix of flavors that everyone will love.
- Impressive Looks: The combination of vibrant colors and cute Halloween-themed decorations not only looks great but also adds to the joyful spirit of the season.
- Perfect for Sharing: This cake is large enough to serve a crowd, making it an excellent option for parties, trick-or-treaters, or family gatherings.
Recipe Overview
- Prep Time: 30 minutes
- Cook Time: 30 minutes
- Total Time: 1 hour
- Servings: 12 servings
- Difficulty Level: Easy
Ingredients You’ll Need for Halloween Cake
Cake Layers
- Vanilla Cake Mix: 1 box (or make from scratch)
- Chocolate Cake Mix: 1 box (or make from scratch)
Buttercream Frosting
- Unsalted Butter: 1 cup, softened
- Powdered Sugar: 4 cups
- Vanilla Extract: 2 teaspoons
- Milk: 2-4 tablespoons (as needed)
Food Coloring
- Black Food Coloring: For spooky accents
- Orange Food Coloring: To bring in those Halloween vibes
- Green Food Coloring: For a fun, creepy touch
Decorations
- Cake Sprinkles: Halloween-themed
- Fondant Decorations: Spiders, ghosts, and other spooky treats
- Graham Crackers: For making a haunted house structure (optional)
here
How to Make Halloween Cake
-
Bake the Cake Layers
Prepare the cake mixes according to the instructions on the box. Divide the batter into two separate bowls—one for the vanilla and one for the chocolate. Pour into greased round cake pans. Bake as directed. Once done, let them cool completely on a wire rack. -
Prepare Buttercream Frosting
In a large bowl, beat the softened butter with an electric mixer until smooth. Gradually add in powdered sugar, mixing well. Add vanilla extract and enough milk to achieve a spreadable consistency. Divide the frosting into different bowls; dye each bowl with your chosen food coloring to create vibrant Halloween shades. -
Frost the Cake Layers
Once the cakes are cool, remove them from the pans. Place one layer on a serving platter and spread a layer of colored buttercream on top. Stack the second cake layer on top of the frosted layer and frost the top and sides with additional buttercream. -
Decorate with Sprinkles
Use your Halloween-themed cake sprinkles to cover the frosted sides of the cake. This adds a fun texture and a festive touch. -
Construct the Haunted House (Optional)
If you’re adding a haunted house, take the graham crackers and construct a house shape by adhering them together with some buttercream frosting. Decorate the house with fondant ghosts and spiders, securing them with additional frosting if needed. -
Top with Spooky Decorations
Finish decorating the cake by adding any remaining fondant decorations on top of the cake to give it a haunted look.
Tips for Success
- Check Doneness: Use a toothpick to check if the cakes are fully baked. If it comes out clean, they are done!
- Grease the Pans: Make sure to grease and flour your cake pans to prevent sticking.
- Butter Temperature: Ensure your butter is softened to room temperature for easier mixing and better texture.
- Layer Cooling: Allow the layers to cool completely before frosting to avoid melting the buttercream.
- Texture Control: If frosting is too thick, add more milk; if too thin, add powdered sugar.
Easy Variations
- Flavor Swaps: Replace the vanilla or chocolate flavor with red velvet or lemon cake mixes for a unique twist.
- Dairy-Free Frosting: Substitute the butter with dairy-free margarine and use a non-dairy milk alternative.
- Add Fillings: Make it even more exciting by adding a layer of jam or fruit filling between the cake layers.
- Different Decor Themes: Change the colors and decorations for other holidays like Christmas or birthdays by swapping out the food dye and sprinkles.
- Cupcake Version: Turn this recipe into Halloween cupcakes for individual servings perfect for parties!
What to Serve with Halloween Cake
- Hot Cocoa: This cake pairs well with a warm cup of cocoa, enhancing the festive mood.
- Pumpkin Spice Latte: The flavors complement the seasonal pumpkin spice found in drinks during fall.
- Spooky Snacks: Serve it alongside themed snacks like witch fingers (cookies) or “eyeball” cheese balls for fun pairing.
- Ice Cream: A scoop of vanilla or pumpkin ice cream will go perfectly with slices of this cake.
Storage and Reheating
- Refrigerator Storage: Store leftover cake in an airtight container in the refrigerator for up to 5 days. Make sure to cover it with plastic wrap.
- Freezer Storage: If needed, freeze individual slices wrapped in plastic wrap and then in foil for up to 3 months.
- Reheating Method: Serve cold or let it come to room temperature. You can also pop it in the microwave for about 10-15 seconds if desired.
- Texture Preservation: To maintain the texture, store cake layers separately from frosting if not consumed immediately.
Common Mistakes to Avoid
- Not Cooling Cakes Properly: Cake layers must be completely cool before frosting to prevent melting.
- Too Much Food Coloring: Add food coloring gradually until you achieve the desired color strength.
- Over-Mixing Frosting: Mix just until combined to avoid a grainy texture.
- Skipping Greasing Pans: Always grease and flour your pans to avoid sticking problems.
- Rushing the Decorating Process: Take your time to decorate and let each layer cool; this makes for a nicer presentation.
Halloween Cake: Background & Cultural Inspiration
The tradition of celebrating Halloween with sweet treats dates back centuries, with roots in ancient Celtic festivals that marked the beginning of winter. The incorporation of festive desserts like this cake reflects the modern adaptations of these traditions, embracing joyful gatherings and playful creativity. Whether it’s a spooky-themed party or a family gathering, cakes decorated with vibrant colors and whimsical designs have become a staple in Halloween festivities. They capture the essence of fun and togetherness, inviting everyone to share in the seasonal celebration.
Frequently Asked Questions
Can I make this cake ahead of time?
Yes, you can bake the cake layers in advance and store them in the refrigerator or freezer. Frosting can also be made ahead and stored in an airtight container.
What can I use instead of graham crackers for the haunted house?
You can use any sturdy cookie or biscuit, such as vanilla wafers or gingerbread, to create your haunted house.
How long does this cake last?
Stored properly in the fridge, the cake can last for up to 5 days. In the freezer, individual slices can be kept for 3 months.
Can I use different colors for the frosting?
Absolutely! Feel free to experiment with any colors you like for the frosting to match different themes or occasions.
What if my frosting is too runny?
If your frosting is too runny, add more powdered sugar a little at a time until you achieve the desired consistency.
Final Thoughts
Making a Halloween Cake is not only a fun baking project, but it also offers a delightful way to celebrate the season. With its colorful layers, playful decorations, and delicious flavors, this cake is an invitation to gather around the table and enjoy the spirit of Halloween. Whether you’re new to baking or a seasoned pro, this recipe will surely be a hit. Grab your ingredients, unleash your creativity, and get ready to delight your family and friends with this spooky treat!
PrintHalloween Cake
A delightful and whimsical Halloween Cake featuring layers of chocolate and vanilla, vibrant frosting, and festive decorations.
- Prep Time: 30 minutes
- Cook Time: 30 minutes
- Total Time: 60 minutes
- Yield: 12 servings
- Category: Dessert
- Method: Baking
- Cuisine: American
- Diet: Vegetarian
Ingredients
- 1 box Vanilla Cake Mix
- 1 box Chocolate Cake Mix
- 1 cup Unsalted Butter, softened
- 4 cups Powdered Sugar
- 2 teaspoons Vanilla Extract
- 2-4 tablespoons Milk
- Black Food Coloring
- Orange Food Coloring
- Green Food Coloring
- Halloween-themed Cake Sprinkles
- Fondant Decorations (spiders, ghosts, etc.)
- Graham Crackers (optional)
Instructions
- Prepare the cake mixes according to the instructions on the box. Divide the batter into two bowls—one for vanilla and one for chocolate.
- Pour the batter into greased round cake pans and bake as directed. Let them cool on a wire rack.
- Beat the softened butter in a large bowl with an electric mixer until smooth. Gradually add in powdered sugar and mix well.
- Add vanilla extract and enough milk to achieve a spreadable consistency. Divide the frosting into bowls and dye each with food coloring.
- Remove the cooled cakes from the pans and place one layer on a serving platter. Spread a layer of colored buttercream on top.
- Stack the second cake layer on top of the frosted layer and frost the top and sides with additional buttercream.
- Cover the frosted sides of the cake with Halloween-themed sprinkles.
- Construct a haunted house with graham crackers (if desired) and decorate with fondant goodies.
- Add any remaining fondant decorations on top for a haunted look.
Notes
Ensure cakes are completely cool before frosting to prevent melting the buttercream. Use different food coloring for seasonal variations.