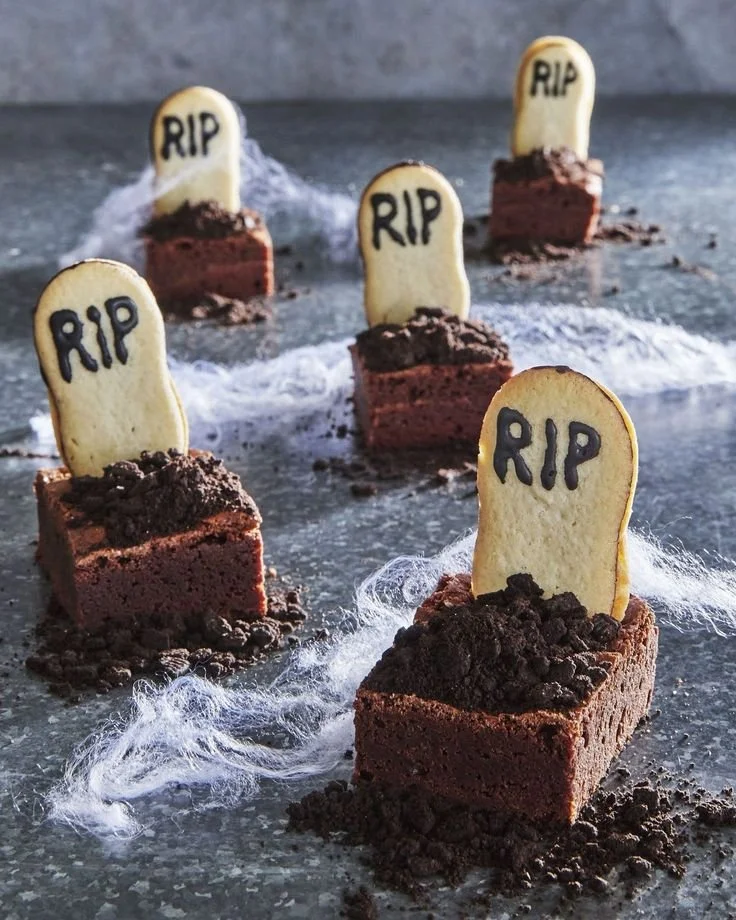
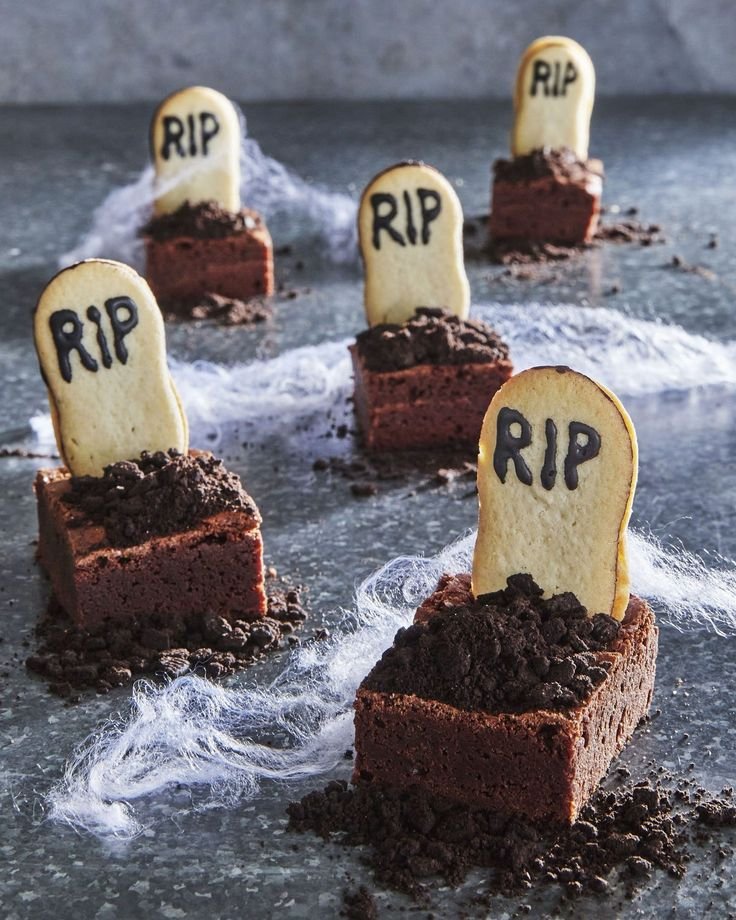
Cute Graveyard Brownies are a delightful treat that add a playful twist to any Halloween celebration. These spooky yet scrumptious brownies are not only easy to make but also perfect for kids and adults alike. With layers of yummy chocolate frosting, creamy fillings, and fun candy decorations, they offer a creative way to enjoy the festive season.
Why You’ll Love Cute Graveyard Brownies
- Easy to Prepare: Made with a boxed brownie mix, these brownies take minimal effort, making them perfect for beginners or those short on time.
- Spooky Fun: The graveyard theme is not only appealing but also a fantastic way to get everyone into the Halloween spirit.
- Customizable Decorations: You can personalize your graveyard scene with different candies and toppings, making each batch unique and fun.
- Perfect for Parties: These brownies are visually striking and delicious, making them an excellent addition to Halloween parties or school events.
- Family-Friendly: Kids will enjoy helping to decorate, making this a fun family activity to bond over during Halloween.
Recipe Overview
- Prep Time: 15 minutes
- Cook Time: 30-35 minutes
- Total Time: 45-50 minutes
- Servings: 12-16 brownies
- Difficulty Level: Easy
Ingredients You’ll Need for Cute Graveyard Brownies
-
Brownie Base:
- 1 box brownie mix
- Eggs (as required by brownie mix)
- Oil (as required by brownie mix)
- Water (as required by brownie mix)
-
Decorative Toppings:
- Chocolate frosting
- Crushed chocolate cookies (for dirt)
- Gummy worms
- Candy tombstones (store-bought or homemade)
- Green food coloring (optional, for grass)
How to Make Cute Graveyard Brownies
-
Prepare the Brownie Mix
Follow the instructions on the brownie mix box using the required eggs, oil, and water. Be sure to grease your baking pan beforehand for easy removal. -
Bake the Brownies
Pour the mixture into the prepared pan and bake according to package instructions, usually around 30-35 minutes. The brownies are done when a toothpick inserted into the center comes out clean or with a few moist crumbs. -
Cool Completely
Once baked, remove the brownies from the oven and let them cool completely in the pan. This prevents the frosting from melting when applied. -
Frost the Brownies
Spread a generous layer of chocolate frosting evenly over the cooled brownies. -
Add the Dirt Effect
Sprinkle crushed chocolate cookies on top of the frosting to give the appearance of dirt. Make sure to cover the frosting well. -
Decorate with Worms and Tombstones
Stick gummy worms into the brownies and place the candy tombstones upright among the "dirt." This adds a fun, spooky touch. -
Optional Grass Effect
If desired, use green food coloring to create a grass effect around the tombstones for added detail. -
Serve and Enjoy
Cut the brownies into squares, arrange them on a platter, and enjoy your spooky treats!
Tips for Success
- Let Brownies Cool Fully: Ensure the brownies are completely cooled to prevent the frosting from melting off.
- Don’t Skip the Greasing: Greasing the pan is essential for easy brownie removal—don’t skip this step!
- Use a Sharp Knife: When cutting the brownies, a sharp knife helps ensure clean edges and a neat presentation.
- Be Generous with Frosting: Adding plenty of frosting will enhance the flavor and texture, making the brownies even more indulgent.
- Get Creative with Toppings: Feel free to use other candies or decorations like mini ghosts or edible glitter to customize your graveyard scene.
Easy Variations
- Nutty Twist: Add chopped nuts like walnuts or pecans to the brownie mix for added texture and flavor.
- Different Frosting: Experiment with vanilla or cream cheese frosting for a different taste.
- Cheesecake Swirl: Make a simple cheesecake filling and swirl it into the brownie batter before baking for a creamy surprise.
- Gluten-Free Option: Substitute the boxed brownie mix with a gluten-free version to cater to dietary needs.
- Seasonal Sprinkles: Use seasonal sprinkles instead of crushed cookies for a more colorful treat.
What to Serve with Cute Graveyard Brownies
- Hot Chocolate: A warm mug of hot chocolate complements the chocolaty goodness and enhances the Halloween vibe.
- Pumpkin Spice Snacks: Pair with pumpkin-flavored treats for a festive autumn combination.
- Ghostly Marshmallow Treats: These ghost-themed desserts make a great addition to your Halloween dessert table.
- Fruit Punch: Serve with a spooky-themed fruit punch for a refreshing contrast to the rich brownies.
- Halloween Cookies: Offer a selection of themed cookies for variety and to engage different tastes.
Storage and Reheating
- Refrigerator Storage: Store leftover brownies in an airtight container in the fridge for up to one week.
- Freezer Storage: For longer storage, wrap brownies tightly in plastic wrap and place in a freezer-safe bag. They can last up to three months.
- Best Reheating Method: To enjoy them warm, microwave individual squares for about 10-15 seconds. This helps maintain their gooey texture.
- Preserve Texture: To keep brownies moist, adding a slice of bread to the container can help absorb excess moisture and preserve texture.
- Meal Prep Note: These brownies can be made ahead of time for parties or gatherings—just ensure they are stored properly.
Common Mistakes to Avoid
- Underbaking/Cooking Too Long: Keep an eye on the baking time; underbaked brownies may fall apart while overbaked ones can become dry.
- Skipping Cooling Time: Frosting on warm brownies can slide off, leading to a messy presentation.
- Using Too Much Topping: While toppings are fun, too much frosting or cookies can overwhelm the brownies. A balanced approach works best.
- Ignoring Ingredient Recommendations: Follow the egg and oil measurements closely; too much or too little can alter the texture significantly.
- Not Greasing the Pan Properly: This leads to brownies sticking to the pan and makes for a troublesome cleanup.
Cute Graveyard Brownies: Background & Cultural Inspiration
The tradition of fun Halloween treats dates back centuries, evolving from ancient customs where people would celebrate the harvest and honor the spirits of the deceased. With roots in various cultures, the concept of creating playful and spooky foods has become an integral part of modern Halloween festivities. Cute Graveyard Brownies stand out as a contemporary adaptation of this tradition, allowing family and friends to gather, share treats, and enjoy festive creativity together. Their structure and decorations represent a lighthearted take on a holiday often associated with fright, making them appealing to all ages.
Frequently Asked Questions
Can I use homemade brownie batter instead of a boxed mix?
Absolutely! You can substitute the boxed mix with your favorite homemade brownie recipe. Just ensure it’s a similar consistency for the best results.
How can I make these brownies nut-free?
Check the brownie mix label to ensure it’s nut-free, and avoid adding any toppings that contain nuts.
Can I prepare these in advance?
Yes! You can make the brownies a day or two before, then frost and decorate them closer to serving time.
How should I store leftover brownies?
Store any leftovers in an airtight container in the refrigerator for up to a week or freeze for longer storage.
What can I substitute for chocolate frosting?
You can use vanilla frosting, cream cheese frosting, or even a simple ganache if you’re looking for a different flavor profile.
Final Thoughts
Cute Graveyard Brownies are not just treats; they are a way to share joy and creativity during Halloween. With simple steps and room for personal flair, these brownies make for a delightful dessert that everyone will love. Whether you’re planning a party or simply treating your family, this recipe is sure to become a seasonal favorite. Give it a try and enjoy the festive flavors that come with it!
PrintCute Graveyard Brownies

Delightful brownies decorated to look like a graveyard, perfect for Halloween celebrations.
- Prep Time: 15 minutes
- Cook Time: 35 minutes
- Total Time: 50 minutes
- Yield: 12-16 brownies
- Category: Dessert
- Method: Baking
- Cuisine: American
- Diet: Vegetarian
Ingredients
- 1 box brownie mix
- Eggs (as required by brownie mix)
- Oil (as required by brownie mix)
- Water (as required by brownie mix)
- Chocolate frosting
- Crushed chocolate cookies (for dirt)
- Gummy worms
- Candy tombstones (store-bought or homemade)
- Green food coloring (optional, for grass)
Instructions
- Prepare the brownie mix by following the instructions on the box using the required eggs, oil, and water. Grease your baking pan beforehand.
- Bake the mixture in the prepared pan according to package instructions, usually around 30-35 minutes.
- Cool completely before frosting to prevent melting.
- Frost the brownies with a generous layer of chocolate frosting.
- Add crushed chocolate cookies on top to create a dirt effect.
- Decorate with gummy worms and place candy tombstones in the dirt.
- Optional: Use green food coloring for a grass effect around tombstones.
- Serve and enjoy your spooky treats!
Notes
Let brownies cool completely to avoid melting the frosting. Use a sharp knife for clean cuts.