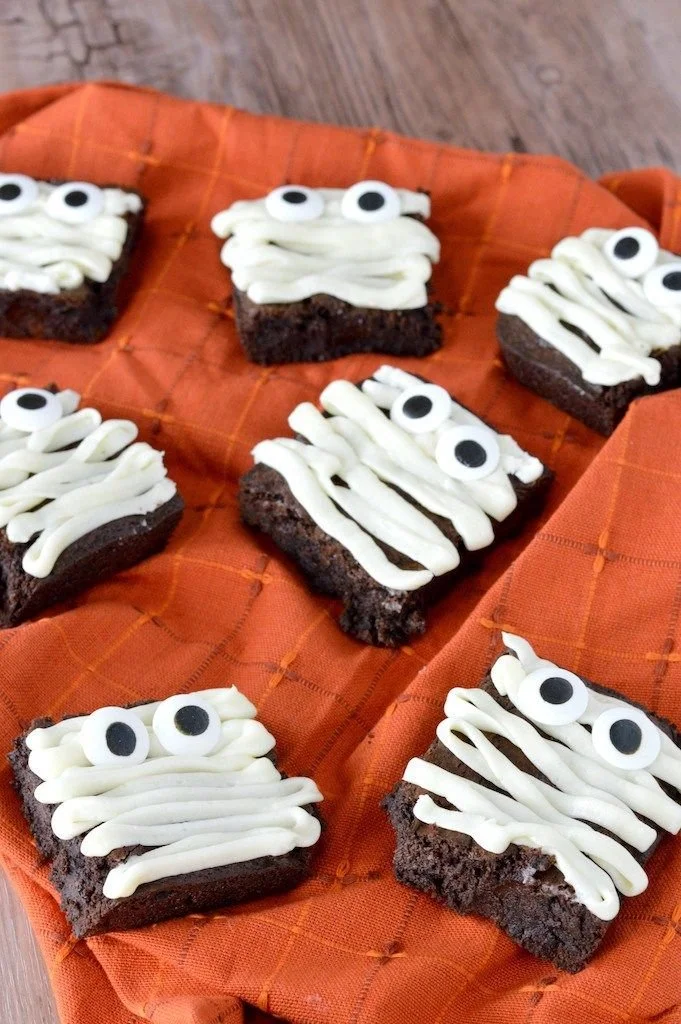
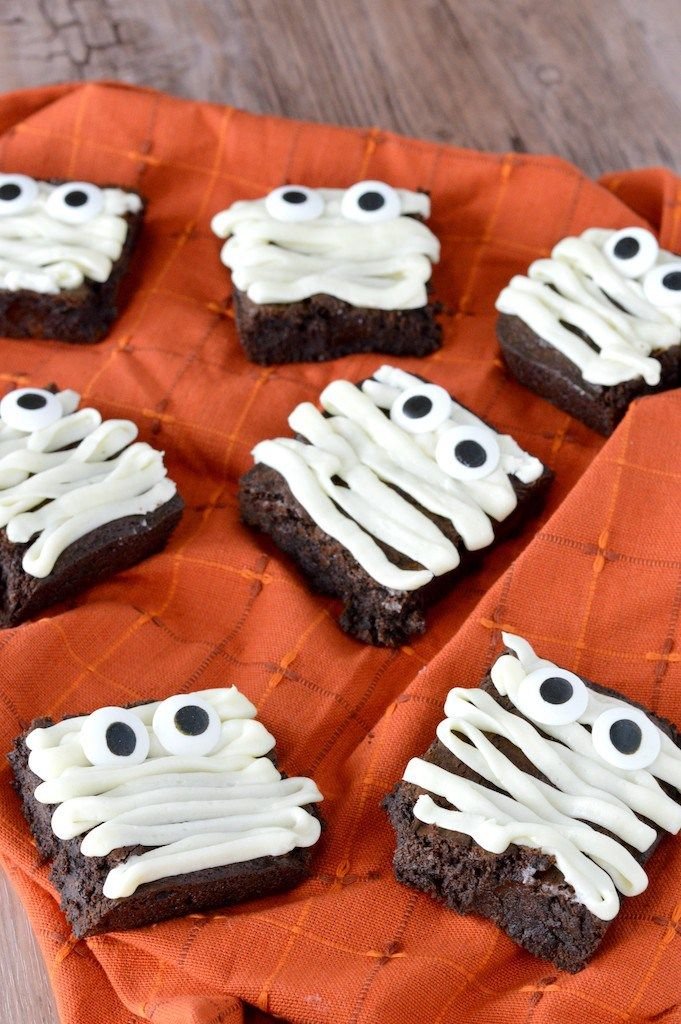
Homemade Chocolate Mummy Brownies for Halloween are a playful and delicious way to celebrate the spooky season. These rich, fudgy brownies are adorned with white chocolate “mummy” decorations, making them not only a treat for the taste buds but also a fun visual delight for kids and adults alike. They’re easy to prepare, and they’re sure to impress your friends and family at any Halloween gathering.
Why You’ll Love Homemade Chocolate Mummy Brownies for Halloween
- Simple to Prepare: The brownie base is straightforward, making this recipe perfect for beginners or anyone looking for a quick bake.
- Customizable Decorations: You can get creative with the mummy designs, allowing kids to join in on the fun for a perfect family activity.
- Rich Chocolate Flavor: These brownies deliver a dense, fudgy chocolate experience that satisfies any chocolate lover’s cravings.
- Perfect for Parties: Their festive appearance makes them ideal for Halloween parties, school events, or simply as a treat to enjoy at home.
- Make Ahead: Brownies can be made in advance, saving you time on the day of your event.
Recipe Overview
- Prep Time: 20 minutes
- Cook Time: 30 minutes
- Total Time: 50 minutes
- Servings: 12 brownies
- Difficulty Level: Easy
Ingredients You’ll Need for Homemade Chocolate Mummy Brownies
-
For the Brownies:
- 1 cup (2 sticks) unsalted butter: Adds richness and moisture.
- 2 cups granulated sugar: Sweetens the brownies and helps create a crispy top.
- 4 large eggs: Binds the ingredients and adds structure.
- 1 teaspoon vanilla extract: Enhances the chocolate flavor.
- 1 cup all-purpose flour: Provides structure.
- 1 cup unsweetened cocoa powder: Gives the brownies their rich chocolate flavor.
- 1 teaspoon baking powder: Helps the brownies rise slightly.
- 1/2 teaspoon salt: Balances sweetness and enhances flavor.
-
For the Mummy Decoration:
- 1 cup white chocolate chips: Melted for drizzling to create the mummy effect.
- Candy eyes: For the final spooky touch.
How to Make Homemade Chocolate Mummy Brownies
-
Preheat and Prepare: Preheat your oven to 350°F (175°C). Grease and line a 9×13-inch baking dish with parchment paper, allowing some to hang over the edges for easy removal.
-
Melt Butter and Mix Wet Ingredients: In a medium saucepan over low heat, melt the butter. Once melted, remove from heat and stir in sugar until well combined. Allow it to cool slightly, then whisk in the eggs one at a time, followed by the vanilla extract.
-
Combine Dry Ingredients: In a separate bowl, sift together the flour, cocoa powder, baking powder, and salt.
-
Mix and Pour Batter: Gradually add the dry ingredients to the wet mixture, stirring until just combined. Be careful not to overmix. Pour the batter into the prepared baking dish, spreading it evenly.
-
Bake: Bake in the preheated oven for 25-30 minutes, or until a toothpick inserted in the center comes out with a few moist crumbs. Let the brownies cool completely in the pan on a wire rack.
-
Decorate: Once cooled, remove the brownies from the pan using the parchment paper. Cut into rectangles or squares. Melt white chocolate chips in a microwave-safe bowl in 30-second intervals, stirring between each until smooth. Transfer to a piping bag or a zip-top bag with a corner snipped off. Drizzle the melted white chocolate over the brownies to create a mummy wrapping effect. Add candy eyes to complete the look.
Tips for Success
- Do Not Overbake: To keep your brownies fudgy, check them a few minutes before the suggested bake time.
- Room Temperature Ingredients: Ensure your eggs and butter are at room temperature for best incorporation.
- Chill Before Cutting: If you’re having trouble cutting the brownies, refrigerate them for about 30 minutes first for cleaner edges.
- Use Good Quality Chocolate: Higher quality chocolate will enhance the overall flavor.
Easy Variations
- Add Nuts: Incorporate chopped walnuts or pecans for some added texture.
- Flavor Swaps: Substitute half of the cocoa powder with chocolate hazelnut spread for a new flavor twist.
- Different Toppings: Instead of mummy decorations, use colorful sprinkles or orange icing to create festive designs.
What to Serve with Homemade Chocolate Mummy Brownies
- Pumpkin Spice Latte: This cozy drink complements the rich chocolate and adds to the seasonal vibe.
- Vanilla Ice Cream: A scoop of cold vanilla ice cream pairs perfectly with warm brownies for an indulgent treat.
- Cinnamon Hot Chocolate: Enhance the chocolate experience with warm cocoa topped with whipped cream and cinnamon.
- Ghostly Cupcakes: Serve with themed cupcakes for a fuller dessert table.
- Fruit Platter: A fresh fruit platter helps cut through the richness of the brownies and adds a healthy balance.
Storage and Reheating
- Refrigerator Storage: Store brownies in an airtight container in the refrigerator for up to one week.
- Freezer Storage: Wrap brownies individually in plastic wrap and place them in a freezer-safe bag for up to three months.
- Reheating: Enjoy brownies at room temperature or warm them slightly in the microwave for about 10-15 seconds. If thawing from frozen, leave them at room temperature for a few hours before serving.
Common Mistakes to Avoid
- Skipping the Parchment Paper: This will make removing the brownies much harder. Always line your baking dish!
- Overmixing the Batter: This can lead to dense, tough brownies. Mix until just combined.
- Not Cooling Completely: Cutting warm brownies will result in crumble. Allow enough cooling time.
Homemade Chocolate Mummy Brownies: Background & Cultural Inspiration
Brownies originated in the United States in the late 19th century and quickly gained popularity as a delectable dessert. Halloween has incorporated treats since its inception, symbolizing the transition from harvest season to winter, and sweets were traditionally given out during festivities. Decorating brownies in spooky themes is a modern twist that engages younger generations and brings families together in culinary creativity during this festive season.
Frequently Asked Questions
Can I make these brownies gluten-free?
Yes, you can substitute all-purpose flour with a gluten-free baking mix designed for one-to-one baking.
How can I make these brownies dairy-free?
Use dairy-free butter and vegan chocolate chips to make a delicious dairy-free version.
What can I use instead of white chocolate?
If you don’t have white chocolate available, consider using melted yogurt chips or simply frosting the brownies with vanilla icing.
How do I store leftover brownies?
Store leftovers in an airtight container at room temperature for up to three days, or refrigerate for a week.
Can I make the brownie batter ahead of time?
Yes, you can prepare the batter in advance. Just store it in the refrigerator for up to 24 hours before baking.
Final Thoughts
Homemade Chocolate Mummy Brownies for Halloween are an enjoyable and simple recipe that everyone will love. With their delightful decorations and rich flavor, they bring a fun and festive touch to any Halloween celebration. Whether you’re hosting a party or just indulging at home, these brownies are worth making this spooky season! Enjoy the process, get creative with your designs, and most importantly, have fun baking!