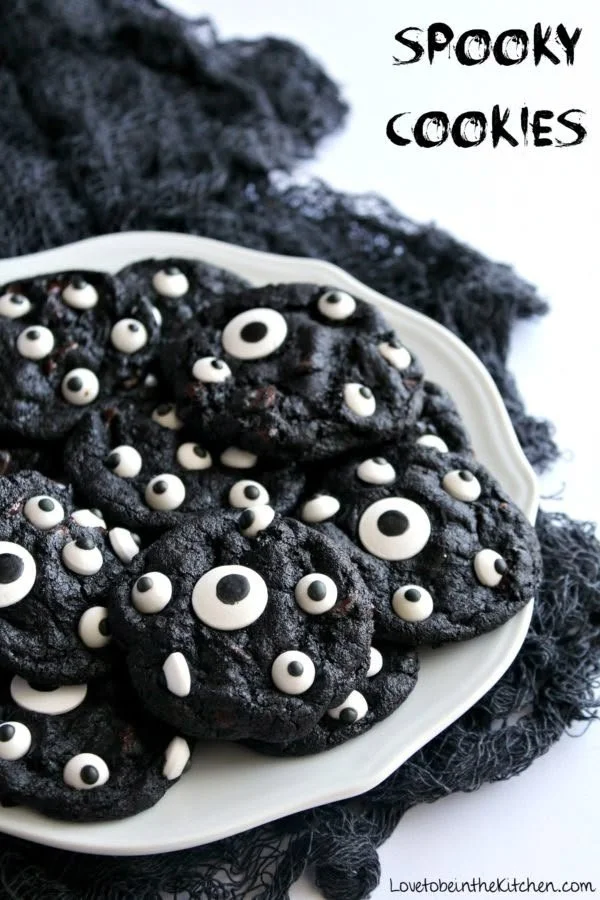
Making Spooky Cookies adds a fun twist to your baking routine, especially around Halloween. These delightful treats are not only visually enchanting with their spooky decorations but also incredibly easy to prepare. Whether for a party, a celebration, or just a fun family activity, these cookies are sure to become a hit and bring smiles to everyone’s faces.
Why You’ll Love Spooky Cookies
- Family Fun Activity: Baking these cookies offers a delightful experience to share with children or friends, adding creativity to your kitchen.
- Easy to Make: With simple ingredients and straightforward steps, even beginner bakers will find this recipe manageable.
- Customizable Appearance: Feel free to play around with toppings and colors, allowing you to create uniquely spooky designs.
- Deliciously Chocolatey: The richness of dark cocoa combined with chocolate chips creates an irresistible flavor that cookie lovers will adore.
- Perfect for Any Occasion: While they make a great Halloween treat, Spooky Cookies can also be enjoyed for birthdays, movie nights, or anytime you crave a sweet indulgence.
Recipe Overview
- Prep Time: 15 minutes
- Cook Time: 10-11 minutes
- Total Time: 25-26 minutes (plus chilling time)
- Servings: About 24 cookies
- Difficulty Level: Easy
Ingredients You’ll Need for Spooky Cookies
-
For the Cookie Dough:
- ½ cup unsalted butter, room temperature
- ½ cup granulated sugar
- ½ cup dark brown sugar, packed
- Optional: Black food coloring for a deeper shade
- 1 large egg, preferably room temperature
- 1 teaspoon vanilla extract
- 1 cup all-purpose flour
- ½ cup + 2 tablespoons Hershey’s Special Dark Cocoa Powder
- 1 teaspoon baking soda
- ¼ teaspoon salt
- 2 tablespoons milk
- 1 ½ cups chocolate chips (semi-sweet)
-
For Decoration:
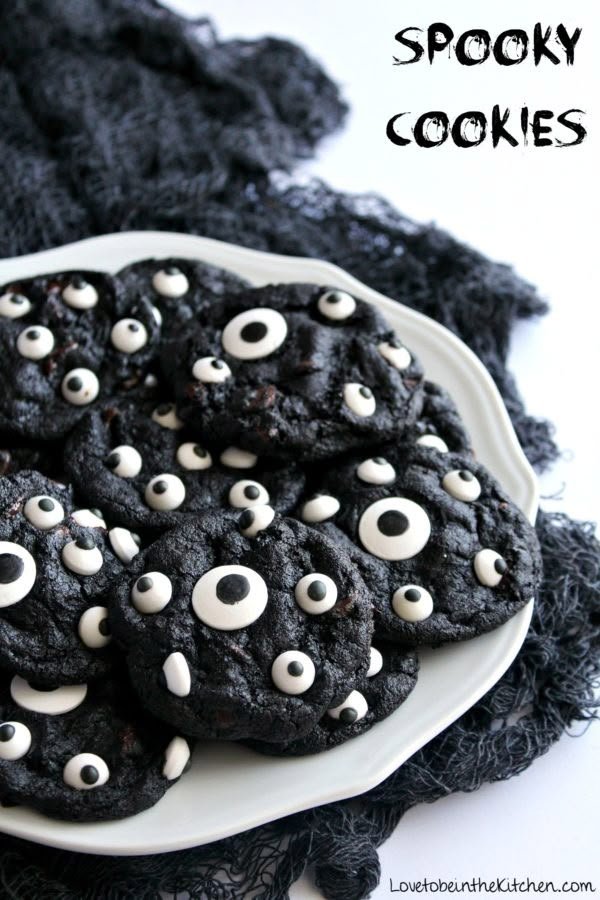
- Candy eyeballs to place on top of cookies
How to Make Spooky Cookies
-
Prepare Baking Sheets: Line two baking sheets with parchment paper or silicone baking mats for easy cookie removal after baking.
-
Mix the Wet Ingredients: In the bowl of an electric mixer, combine the room temperature butter, granulated sugar, and dark brown sugar. If you want a darker cookie, add black food coloring at this stage. Beat on medium-high speed until the mixture is light and fluffy, about 2-3 minutes.
-
Add Egg and Vanilla: Blend in the large egg and vanilla extract. Make sure to scrape down the sides of the bowl if needed to ensure even mixing.
-
Combine Dry Ingredients: In a separate bowl, whisk together the all-purpose flour, dark cocoa powder, baking soda, and salt. This helps to prevent clumps in your cookie dough.
-
Mix Dry with Wet Ingredients: Gradually add the dry ingredients to the mixer on low speed just until incorporated. Do not over-mix to keep the cookies tender.
-
Incorporate Milk and Chocolate Chips: Mix in the milk on the lowest speed until just combined, and then gently fold in the chocolate chips with a spatula.
-
Shape the Cookies: Roll about 2 tablespoons of the dough into balls and place them on the prepared baking sheets. Flatten each ball slightly.
-
Add Eyeballs: Top each cookie with candy eyeballs for a fun and spooky look.
-
Chill: Place the cookie sheets in the freezer for 10-15 minutes. Alternatively, you can chill the dough for at least 2 hours or up to 36 hours if you prefer to bake later.
-
Bake: Preheat your oven to 350°F (175°C) and bake the cookies for 10-11 minutes, or until they are set but still soft in the center.
-
Cool the Cookies: Let the cookies cool on the baking sheets for about 5 minutes, then transfer them to a wire rack to cool completely.
Tips for Success
- Room Temperature Ingredients: Ensure your butter and egg are at room temperature for a smoother batter and better texture.
- Don’t Overmix: Combine ingredients just until incorporated to avoid tough cookies.
- Chilling the Dough: Chilling not only enhances the flavor but also prevents the cookies from spreading too much while baking.
- Use Quality Chocolate: Opt for high-quality chocolate chips for a richer taste; semi-sweet works well, but you can also try dark chocolate for an intense flavor.
- Keep an Eye on Bake Time: Since ovens vary, start checking your cookies a minute early to avoid overbaking.
Easy Variations
- Nutty Spooky Cookies: Add ½ cup of chopped nuts, like walnuts or pecans, for extra crunch.
- White Chocolate Chips: Swap semi-sweet chips for white chocolate chips for a different sweet profile.
- Spicy Touch: Mix in a pinch of cayenne or chili powder for a surprising kick.
- Fruit Infusion: Incorporate dried cranberries or cherries for a fruity twist that complements the chocolate.
- Different Shapes: Use cookie cutters to create different spooky shapes like bats or ghosts.
What to Serve with Spooky Cookies
- Milk: A classic pairing, milk enhances the cookie’s rich chocolate flavor and helps balance sweetness.
- Ice Cream: Serve warm cookies with a scoop of vanilla or pumpkin ice cream for a delightful dessert.
- Coffee or Tea: A cup of coffee or spiced chai complements the chocolatey goodness and adds warmth.
- Fruit Salad: The freshness of fruit salad provides a refreshing contrast to the rich cookies.
Storage and Reheating
- Refrigerator Storage: Keep cookies in an airtight container at room temperature for up to one week.
- Freezer Storage: For longer storage, freeze cookies in a single layer until solid, then transfer to a freezer-safe bag for up to three months.
- Reheating: To enjoy warm cookies again, pop them in the microwave for 10-15 seconds or warm them in an oven at 350°F (175°C) for a few minutes, ensuring they retain their soft texture.
- Meal Prep Note: You can prepare the dough ahead of time and freeze it. Just thaw in the refrigerator before baking.
Common Mistakes to Avoid
- Skipping the Chilling Step: Chilling the dough helps improve texture and prevent excessive spreading.
- Using Cold Butter: Make sure your butter is softened to prevent a lumpy texture in the dough.
- Crowding the Baking Sheet: Leave enough space between cookie dough balls to allow for spreading while they bake.
- Overbaking: Be careful not to bake the cookies too long; they may seem underbaked but will firm up as they cool.
- Neglecting Parchment Paper: Always line your baking sheets to prevent sticking and ensure even baking.
Spooky Cookies: Background & Cultural Inspiration
Spooky Cookies are a whimsical take on traditional cookie recipes, crafted especially for Halloween celebrations. This seasonal treat embodies the spirit of fun and creativity associated with Halloween, where treats of all shapes and sizes come alive with spooky designs. Much like the colorful decorations, the origin of cookies traces back centuries, evolving from simple baked goods to playful creations suitable for festive occasions. These cookies not only engage children and adults alike in baking but also serve as a catalyst for storytelling and bonding, making them a cherished part of many family traditions.
Frequently Asked Questions
Can I make these cookies ahead of time?
Yes, you can prepare the dough ahead of time and refrigerate it for up to 36 hours or freeze it for longer storage. Just thaw in the fridge before baking.
What can I substitute for chocolate chips?
You can use white chocolate chips, butterscotch chips, or even chunks of your favorite chocolate bar as a tasty alternative.
How should I store leftover cookies?
Store leftover cookies in an airtight container at room temperature for up to a week. If you want them to last longer, you can freeze them.
Can I use a different type of cocoa powder?
Yes, you can use natural cocoa powder instead of Dutch-processed. Just keep in mind that it will affect the flavor and color slightly.
Why are my cookies spreading too much?
If your cookies are spreading too much, the dough may have been too warm, or you skipped the chilling step. Also, ensure that you measured your flour correctly.
Final Thoughts
Spooky Cookies are not just delightful in taste but also bring a fun and interactive element to your baking. With simple ingredients and easy steps, they are an excellent choice for any occasion. Whether you’re celebrating Halloween or simply want to create some creative treats, these cookies will inspire joy and laughter in your kitchen. Enjoy baking and sharing these spooky delights with family and friends!