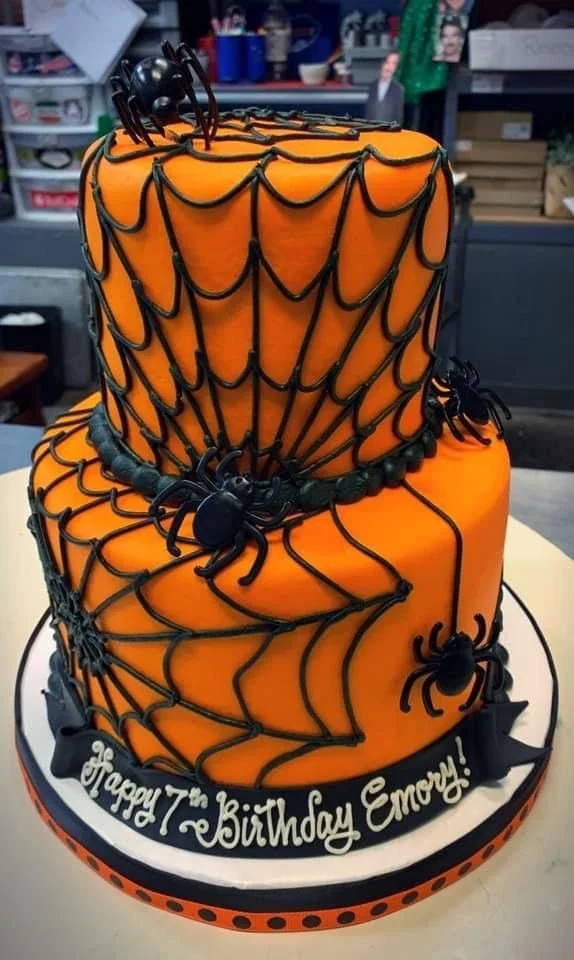
Making a Tiered Spiderweb Cake is an exciting way to bring a touch of creativity and fun to your dessert table. This stunning cake not only looks impressive but also delivers delightful flavors that will leave your guests in awe. Whether you’re celebrating Halloween or simply want to enjoy a unique treat, this recipe is sure to impress.
Why You’ll Love Tiered Spiderweb Cake
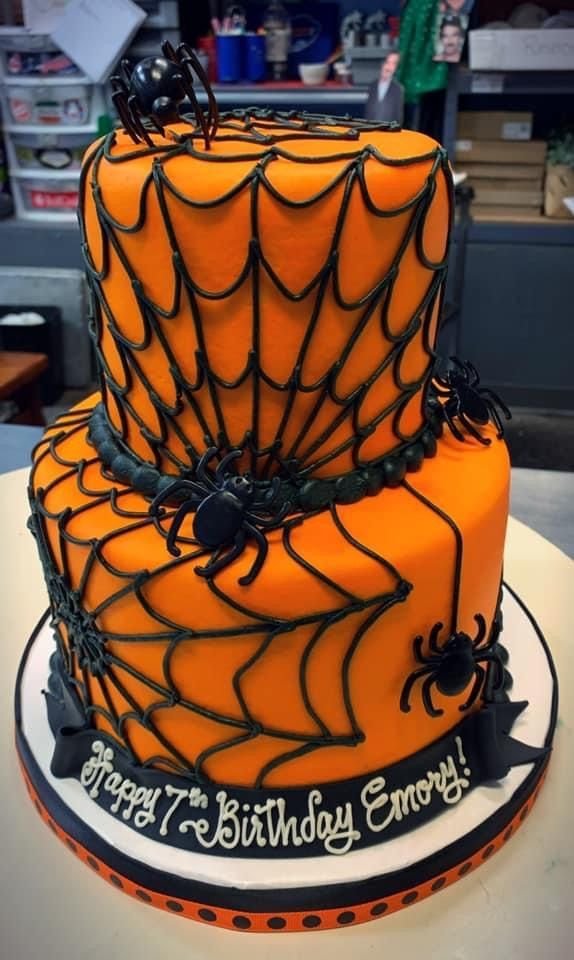
- Visual Appeal: This cake is a showstopper with its multi-layer design and intricate spiderweb decoration, perfect for special occasions.
- Customizable Flavors: You can select your favorite cake flavors and fillings, allowing you to tailor it to your taste.
- Fun to Decorate: Decorating the cake is a great opportunity for creativity, making it a perfect family project or a fun activity with friends.
- Moist and Delicious: The cake layers are moist and flavorful, complemented by a rich frosting that brings everything together.
- Memorable Presentations: Serve this cake at parties or potlucks, and it’s sure to leave a lasting impression on your guests.
Recipe Overview
- Prep Time: 30 minutes
- Cook Time: 40 minutes
- Total Time: 1 hour 10 minutes, plus cooling
- Servings: 12-16 slices
- Difficulty Level: Medium
Ingredients You’ll Need for Tiered Spiderweb Cake
For the Cake Layers:
- 3 cups all-purpose flour: The base that gives structure.
- 2 ½ tsp baking powder: Helps the cake rise.
- 1 tsp baking soda: Provides additional leavening.
- 1 tsp salt: Enhances flavor.
- 1 cup unsalted butter, softened: Adds richness and moisture.
- 2 cups granulated sugar: Sweetens and helps in browning.
- 4 large eggs: Binds the ingredients and adds moisture.
- 1 tbsp vanilla extract: Adds flavor.
- 1 cup buttermilk: Ensures a tender crumb.
For the Frosting:
- 2 cups unsalted butter, softened: The foundation of a creamy frosting.
- 5-6 cups powdered sugar: Sweetens and thickens the frosting.
- 1 tsp vanilla extract: Adds flavor.
- 2-4 tbsp heavy cream: Adjust for desired consistency.
For Decoration:
- Black and white fondant: For the spiderweb design.
- Plastic creepy crawlies: Optional, for added fun.
How to Make Tiered Spiderweb Cake
Step 1: Prepare the Oven and Pans
Preheat your oven to 350°F (175°C). Grease and flour three 9-inch round cake pans to prevent sticking.
Step 2: Mix Dry Ingredients
In a medium bowl, whisk together the flour, baking powder, baking soda, and salt. Set this mixture aside.
Step 3: Cream Butter and Sugar
In a large mixing bowl, beat the softened butter and granulated sugar together until light and fluffy, about 3-4 minutes. This step is crucial for a light cake.
Step 4: Add Eggs and Vanilla
Add the eggs one at a time, mixing well after each addition. Then stir in the vanilla extract.
Step 5: Alternate Adding Dry Ingredients and Buttermilk
Gradually add the dry ingredient mixture to the butter mixture, alternating with the buttermilk. Begin with the flour mixture and end with it. Mix just until combined; do not overmix.
Step 6: Bake the Cake
Divide the batter evenly between the prepared pans. Bake in the preheated oven for 25-30 minutes or until a toothpick inserted into the center comes out clean. Allow the cakes to cool in the pans for 10-15 minutes, then transfer to wire racks to cool completely.
Step 7: Prepare the Frosting
In a large bowl, beat the softened butter until creamy. Gradually add powdered sugar, mixing well until smooth. Stir in the vanilla, and add heavy cream one tablespoon at a time until you reach your desired consistency.
Step 8: Layer and Frost the Cakes
Once the cakes are completely cool, place one layer on a serving plate. Spread a layer of frosting on top. Repeat with the second layer and top with the final layer. Use the remaining frosting to coat the top and sides of the cake.
Step 9: Create the Spiderweb Decoration
Roll out the black and white fondant separately to create the spiderweb design. If you’d like, place the plastic creepy crawlies on top for extra flair.
Tips for Success
- Ensure Even Baking: Rotate your cake pans halfway through baking to ensure even cooking.
- Check Cake for Doneness: Use a toothpick to check for doneness; the cake is ready when it comes out clean.
- Level the Cakes: If your cakes have domed tops, use a serrated knife to level them before frosting to create a stable tiered cake.
- Chill the Frosting: If the frosting gets too soft while decorating, refrigerate it for a bit to firm it up.
- Make It Ahead of Time: Prepare the cakes a day before serving and frost them on the day for the best taste and texture.
Easy Variations
- Chocolate Cake: Substitute half the flour with cocoa powder for a rich chocolate version.
- Lemon Raspberry: Add lemon zest and use raspberry filling between layers for a fruity flavor.
- Spice Cake: Incorporate spices like cinnamon and nutmeg for a seasonal twist.
- Gluten-Free: Use a 1:1 gluten-free flour blend in place of all-purpose flour.
- Vegan Option: Replace eggs with flax eggs and use non-dairy butter and milk alternatives.
What to Serve with Tiered Spiderweb Cake
- Vanilla Ice Cream: The creaminess of vanilla ice cream pairs beautifully with the rich cake flavors.
- Fresh Berries: A side of mixed berries adds freshness and a pop of color to your dessert.
- Hot Coffee: The bitterness of coffee complements the sweetness of the cake perfectly.
- Milk: A classic pairing; milk balances the cake’s sweetness and is great for soaking up the flavors.
Storage and Reheating
- Refrigerator Storage: Store any leftovers in an airtight container in the fridge for up to 5 days.
- Freezer Storage: You can freeze the layers (wrapped in plastic wrap) for up to 3 months before frosting.
- Reheating: Serve slices at room temperature; if desired, briefly microwave slices for a few seconds to warm slightly.
- Preserve Texture: Cover the cake with plastic wrap to prevent it from drying out.
Common Mistakes to Avoid
- Overmixing the Batter: This can lead to a dense cake, so mix until just combined.
- Skipping the Cooling Step: Frosting a warm cake can melt the frosting and create a messy appearance.
- Not Leveling Cakes: Skipping this step can result in an unevenly stacked cake that may topple.
- Using Cold Ingredients: Always use room temperature eggs and butter for better mixing.
Tiered Spiderweb Cake: Background & Cultural Inspiration
The Tiered Spiderweb Cake is a fun twist on traditional layered cakes, often crafted during Halloween celebrations or themed parties. The concept of layering cake dates back centuries, often symbolizing abundance and richness. The spiderweb design pays homage to the spooky atmosphere of Halloween, creating a striking centerpiece that embraces seasonal fun. This cake can also reflect personal creativity, allowing decorators to infuse their unique styles into the design.
Frequently Asked Questions
Can I make the cake ahead of time?
Yes, you can bake the cake layers in advance and freeze them for up to three months. Frost just before serving for optimal freshness.
What can I substitute for buttermilk?
You can make a quick substitute by mixing 1 cup of milk with 1 tablespoon of white vinegar or lemon juice. Let it sit for 5-10 minutes before using.
How can I achieve a smooth frosting?
To achieve a smooth finish, warm your spatula under hot water, then dry it before smoothing out the frosting.
How spicy should I make the cake?
Adjust spices according to your taste; start with small amounts and increase until you reach your desired flavor profile.
Can I use fondant to create different designs?
Absolutely! Fondant can be shaped into many designs. Get creative with your decorations to make your cake unique.
Final Thoughts
The Tiered Spiderweb Cake offers not only a delicious treat but also a chance to express creativity and charm at your gatherings. With its impressive appearance and delightful taste, it is certainly worth a try for your next celebration. Gather your ingredients, unleash your inner baker, and enjoy making this fun, festive dessert that will be remembered long after the last slice is gone.
PrintTiered Spiderweb Cake
A multi-layered cake with a creative spiderweb design, perfect for Halloween and special occasions.
- Prep Time: 30 minutes
- Cook Time: 40 minutes
- Total Time: 70 minutes
- Yield: 12-16 slices
- Category: Dessert
- Method: Baking
- Cuisine: American
- Diet: Vegetarian
Ingredients
- 3 cups all-purpose flour
- 2 ½ tsp baking powder
- 1 tsp baking soda
- 1 tsp salt
- 1 cup unsalted butter, softened
- 2 cups granulated sugar
- 4 large eggs
- 1 tbsp vanilla extract
- 1 cup buttermilk
- 2 cups unsalted butter, softened (for frosting)
- 5-6 cups powdered sugar
- 1 tsp vanilla extract (for frosting)
- 2-4 tbsp heavy cream (for frosting)
- Black and white fondant (for decoration)
- Plastic creepy crawlies (optional, for decoration)
Instructions
- Preheat your oven to 350°F (175°C). Grease and flour three 9-inch round cake pans.
- Whisk together the flour, baking powder, baking soda, and salt in a medium bowl. Set aside.
- Beat the softened butter and granulated sugar together until light and fluffy, about 3-4 minutes.
- Add the eggs one at a time, mixing well after each addition, then stir in the vanilla extract.
- Gradually add the dry mixture to the butter mixture, alternating with the buttermilk. Mix just until combined.
- Divide the batter evenly between the prepared pans and bake for 25-30 minutes or until a toothpick comes out clean.
- Cool the cakes in the pans for 10-15 minutes, then transfer to wire racks to cool completely.
- Beat the softened butter for the frosting until creamy. Gradually add powdered sugar and mix until smooth. Stir in vanilla and add cream until desired consistency.
- Place one cake layer on a plate, spread frosting on top, add the second layer, repeat, then frost the top and sides of the cake.
- Roll out fondant to create a spiderweb design and place any plastic creepy crawlies on top if desired.
Notes
Ensure to level the cakes before frosting for stability and rotate the pans during baking for even cooking.