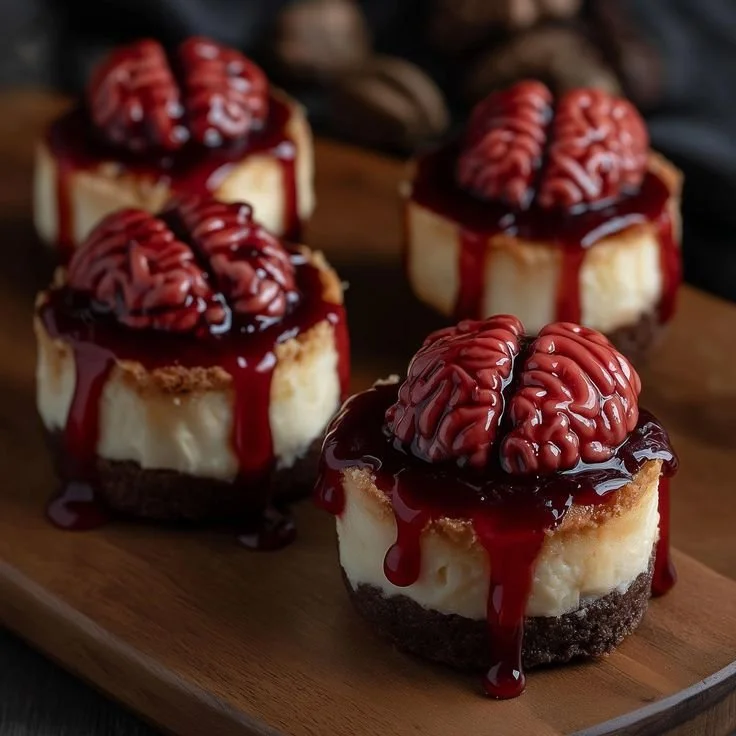
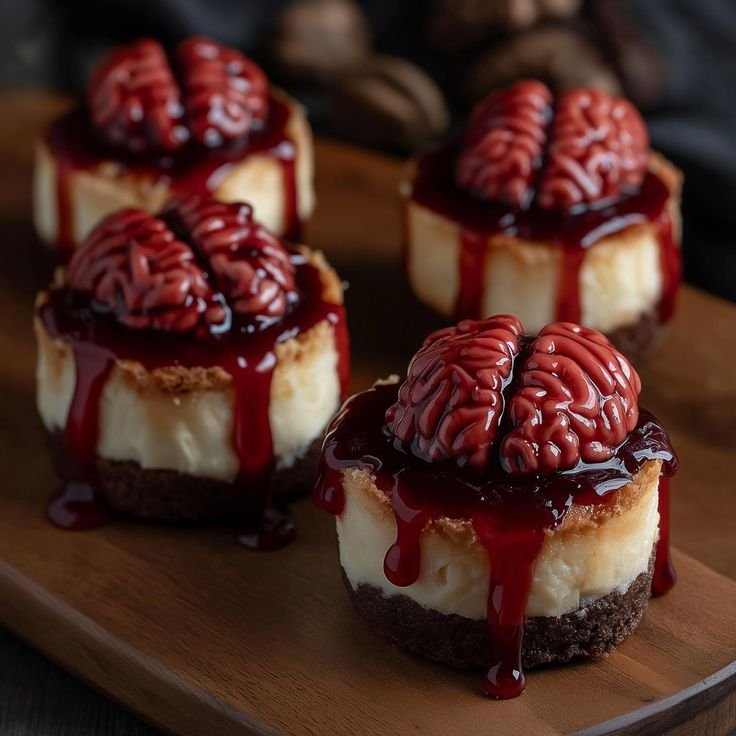
Get ready to celebrate Halloween with a fun twist on dessert: this Halloween Brain Cheesecake is a delightful and spooky treat that will impress your guests. Creamy and rich, this cheesecake combines sweet flavors with a playful "brain" presentation, making it perfect for festive gatherings or trick-or-treating parties.
Why You’ll Love Halloween Brain Cheesecake
- Easy to Make: This recipe is straightforward, making it accessible for even beginner cooks, ensuring everyone can create a stunning dessert.
- Spooktacular Presentation: The brain design offers a visually striking centerpiece, perfect for Halloween-themed meals or gatherings.
- Rich and Creamy: The cream cheese and heavy cream come together to create a smooth, luscious filling that everyone will enjoy.
- Customizable Look: You can adjust the toppings and colors based on your theme, allowing for creativity while maintaining the delightful flavor.
- Perfect for Sharing: With its generous servings, this cheesecake is ideal for parties, providing a fun and festive way to share dessert with friends and family.
- No Baking Required: This cheesecake requires minimal cooking time, allowing you to spend less time in the kitchen and more time enjoying the celebration.
Recipe Overview
- Prep Time: 30 minutes
- Cook Time: 5 minutes (for the crust)
- Total Time: 4 hours (includes chilling)
- Servings: 12
- Difficulty Level: Easy
Ingredients You’ll Need for Halloween Brain Cheesecake
-
For the Crust:
- 1 ½ cups cookie crumbs (any flavor you prefer)
- ½ cup unsalted butter, melted (helps bind the crust together)
-
For the Filling:
- 16 oz cream cheese, softened (creates the creamy base)
- 1 cup granulated sugar (adds sweetness)
- 1 teaspoon vanilla extract (enhances flavor)
- 1 cup heavy cream (for a rich texture)
- 1 tablespoon unflavored gelatin (helps set the cheesecake)
-
For the Topping:
- 1 package of Jell-O (red or pink) (to create the brain effect)
- ½ cup raspberry sauce (adds a "blood" effect)
How to Make Halloween Brain Cheesecake
- Prepare the Pan: Preheat your oven to 350°F (175°C). Prepare a springform pan by greasing the sides and lining the bottom with parchment paper if desired.
- Make the Crust: In a bowl, combine the cookie crumbs with the melted butter. Mix until the crumbs are evenly moistened. Press this mixture firmly into the bottom of the springform pan, creating an even layer. Bake for 5 minutes to set and then let it cool.
- Mix the Filling: In a large mixing bowl, beat the softened cream cheese, sugar, and vanilla extract together until smooth and creamy, about 3-4 minutes.
- Whip the Cream: In a separate bowl, whip the heavy cream until stiff peaks form. Carefully fold this whipped cream into the cream cheese mixture, ensuring you retain the light and fluffy texture.
- Pour the Filling: Spread the cream cheese filling over the cooled crust in your springform pan. Smooth the top and refrigerate for at least 2-3 hours or until firm.
- Prepare the Jell-O: While the cheesecake chills, make the Jell-O according to the package instructions. Allow it to cool at room temperature until it slightly thickens but is not fully set.
- Create Brain Effect: Pour the slightly thickened Jell-O over the cheesecake in a brain design or shape. Return the cheesecake to the refrigerator for another hour to set completely.
- Serve: Drizzle raspberry sauce on top just before serving for a spooky "blood" effect. Chill until ready to serve, then carefully remove the springform pan and unveil your spooky dessert.
Tips for Success
- Soften the Cream Cheese: Make sure your cream cheese is at room temperature for easier blending; this avoids lumps in your filling.
- Don’t Overmix: When folding the whipped cream into the cream cheese mixture, be gentle to maintain the fluffy texture.
- Allow Time to Chill: Patience is key. Ensure each chilling step is followed for the best texture and flavor.
- Use the Right Gelatin: If substituting gelatin, use a brand that will set firmly without compromising the cheesecake’s consistency.
- Personalize the Raspberry Sauce: You can make your own raspberry sauce for a fresh taste or use store-bought for convenience.
Easy Variations
- Chocolate Brain Cheesecake: Substitute the cookie crumbs with chocolate cookies and add cocoa powder to the filling for a chocolate twist.
- Fruit Flavored Jell-O: Use different flavors of Jell-O to create various spooky colors, like green or blue.
- Nut Crust: Combine nuts with the cookie crumbs for added crunch and flavor.
- Dairy-Free Option: Use dairy-free cream cheese and coconut cream as substitutes for a lactose-free version.
- Add a Layer of Fruit: Incorporate fresh berries between the crust and cheesecake for added flavor and texture.
What to Serve with Halloween Brain Cheesecake
- Coffee or Tea: Offers a comforting contrast to the sweetness of the cheesecake.
- Halloween-Themed Cocktails: Bright, colorful drinks enhance the festive atmosphere.
- Pumpkin Spice Treats: Pair with other seasonal flavors for a cohesive Halloween spread.
- Chocolate-Covered Strawberries: The richness complements the cheesecake’s sweetness.
- Gummy Worms: Add a playful element to the dessert table, keeping with the Halloween theme.
Storage and Reheating
- Refrigerator Storage: Store the cheesecake in an airtight container in the refrigerator for up to 3 days.
- Freezer Storage: If you want to keep it longer, wrap it tightly in plastic wrap and foil and freeze for up to one month. Thaw overnight in the fridge before serving.
- Preserve Texture: Avoid direct exposure to air when storing, as it can dry out the cheesecake.
- Meal Prep Tip: This cheesecake is great for making ahead of time; just add the toppings right before serving for the best look.
Common Mistakes to Avoid
- Not Allowing Cheese to Soften: Skipping the room temperature step can result in lumps in your filling.
- Overcrowding the Pan: Ensure your pan is the right size; otherwise, the cheesecake may overflow while setting.
- Rushing the Chilling Process: Don’t skip the chilling times; they are crucial for texture and stability.
- Not Following Jell-O Instructions: Make sure the Jell-O cools appropriately before pouring it on the cheesecake, or it may ruin the decoration.
- Neglecting the Drizzle: Add the raspberry sauce just before serving; if added too early, it may cause the cheesecake to appear soggy.
Halloween Brain Cheesecake: Background & Cultural Inspiration
The Halloween Brain Cheesecake draws inspiration from classic horror themes prevalent in Halloween festivities. The iconic brain shape adds a spooky and playful touch to your dessert table. Cheesecakes have a long-standing history in dessert culture, but their versatility allows creative adaptations like this one. Halloween treats often blend frightful designs with delicious flavors, and this cheesecake ties those elements together beautifully. Whether at a party, family gathering, or just for fun, this cheesecake makes an impact while staying deliciously approachable.
Frequently Asked Questions
Can I make this cheesecake in advance?
Yes, this cheesecake can be made up to a day in advance. Just make sure to add the raspberry sauce before serving for freshness.
Can I use a different flavor of Jell-O?
Absolutely! Feel free to experiment with different flavors to change the color and taste of your cheesecake.
How long does the cheesecake last in the fridge?
Store the cheesecake in an airtight container in the refrigerator for up to 3 days for the best quality.
Can I substitute the gelatin?
For a vegetarian version, look for agar-agar as a substitute for gelatin, though the texture may vary slightly.
What should I do if my cheesecake doesn’t set?
If the cheesecake doesn’t seem to set properly, ensure you’ve allowed enough chilling time. If it’s still soft after overnight refrigeration, you may need to refrigerate it longer.
Final Thoughts
This Halloween Brain Cheesecake is a delightful and creepy dessert that combines fun and flavor, perfect for any Halloween celebration. With its simple steps and impressive results, it’s sure to thrill your guests and family alike. Whether you’re hosting a spooky gathering or just want to indulge in themed treats, this cheesecake is a must-try that promises to leave a lasting impression. Enjoy creating this masterpiece, and happy haunting!
PrintHalloween Brain Cheesecake
A creamy and spooky cheesecake designed to resemble a brain, perfect for Halloween celebrations.
- Prep Time: 30 minutes
- Cook Time: 5 minutes
- Total Time: 240 minutes
- Yield: 12 servings
- Category: Dessert
- Method: No-Bake
- Cuisine: American
- Diet: Vegetarian
Ingredients
- 1 ½ cups cookie crumbs
- ½ cup unsalted butter, melted
- 16 oz cream cheese, softened
- 1 cup granulated sugar
- 1 teaspoon vanilla extract
- 1 cup heavy cream
- 1 tablespoon unflavored gelatin
- 1 package of Jell-O (red or pink)
- ½ cup raspberry sauce
Instructions
- Prepare the Pan: Preheat your oven to 350°F (175°C). Prepare a springform pan by greasing the sides and lining the bottom with parchment paper if desired.
- Make the Crust: In a bowl, combine the cookie crumbs with the melted butter. Mix until the crumbs are evenly moistened, then press into the bottom of the springform pan. Bake for 5 minutes and let cool.
- Mix the Filling: In a large mixing bowl, beat the softened cream cheese, sugar, and vanilla extract together until smooth and creamy, about 3-4 minutes.
- Whip the Cream: In a separate bowl, whip the heavy cream until stiff peaks form. Fold this whipped cream into the cream cheese mixture gently.
- Pour the Filling: Spread the cream cheese filling over the cooled crust, smooth the top, and refrigerate for at least 2-3 hours or until firm.
- Prepare the Jell-O: While the cheesecake chills, make the Jell-O according to the package instructions. Allow it to cool at room temperature until slightly thickened.
- Create Brain Effect: Pour the slightly thickened Jell-O over the cheesecake in a brain design. Return to the refrigerator for another hour to set completely.
- Serve: Drizzle raspberry sauce on top just before serving. Chill until ready to serve.
Notes
Make sure to let the cream cheese soften to avoid lumps. Customize your Jell-O flavors for variety.