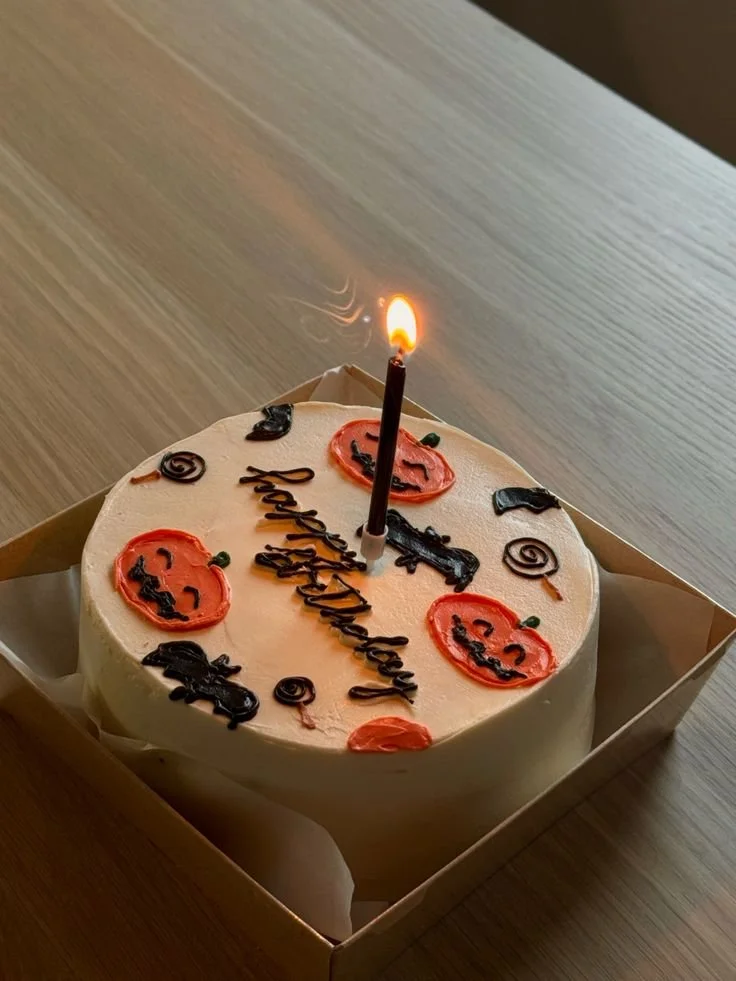
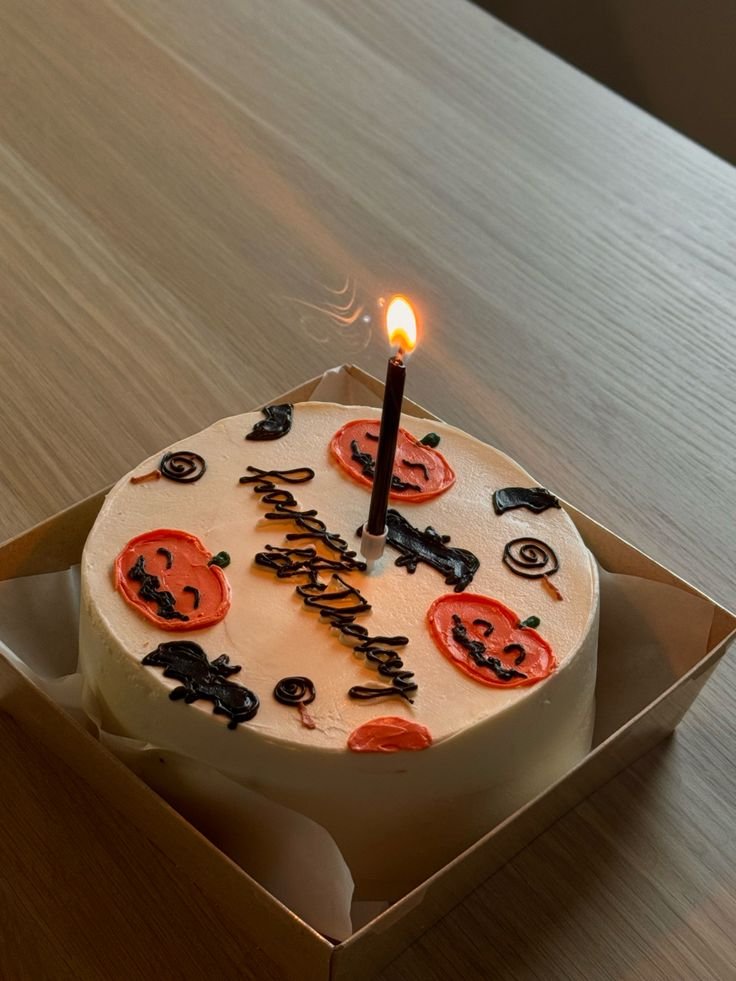
Making a Halloweentown cake is a delightful way to celebrate the spooky season in style. This minimalist Halloween cake combines simple yet striking elements that make it both fun to create and beautiful to display. Whether you’re hosting a Halloween party or looking for a creative dessert for a birthday, this cake is sure to wow both kids and adults alike. Plus, you can easily personalize it with different decorations!
Why You’ll Love Halloweentown Cake
- Easy to Make: With straightforward steps and minimal ingredients, this cake is perfect for baking novices.
- Customizable Decor: You can tailor the decorations to fit any Halloween theme, from spooky to whimsical.
- Perfect for Any Occasion: Whether it’s Halloween or a birthday, this cake fits right in for any celebration.
- Minimalist Aesthetic: The minimalist approach allows the flavors to shine while creating an elegant and modern look.
- Fun for Kids: Get the whole family involved in the decorating process—it’s a great way for kids to express their creativity.
Recipe Overview
- Prep Time: 20 minutes
- Cook Time: 30 minutes
- Total Time: 50 minutes
- Servings: 8
- Difficulty Level: Easy
Ingredients You’ll Need for Halloweentown Cake
-
For the Cake:
- 2 cups all-purpose flour
- 1 ½ cups granulated sugar
- 1 cup unsweetened cocoa powder
- 1 ½ teaspoons baking powder
- 1 teaspoon baking soda
- ½ teaspoon salt
- 2 large eggs
- 1 cup whole milk
- ½ cup vegetable oil
- 2 teaspoons vanilla extract
- 1 cup boiling water
-
For the Frosting:
- 1 cup unsalted butter, softened
- 4 cups powdered sugar
- ¼ cup heavy cream
- 1 teaspoon vanilla extract
- Food coloring (orange and black)
-
Decorations:
- Halloween-themed sprinkles
- Fondant decorations or edible markers if desired
How to Make Halloweentown Cake
-
Preheat Your Oven
Preheat your oven to 350°F (175°C). Grease and flour two 9-inch round cake pans. -
Mix the Dry Ingredients
In a large bowl, whisk together the flour, sugar, cocoa powder, baking powder, baking soda, and salt until well combined. -
Add the Wet Ingredients
Add the eggs, milk, vegetable oil, and vanilla extract to the dry ingredients. Mix on medium speed until well blended. -
Incorporate Boiling Water
Carefully add the boiling water to the batter. Mix until smooth; the batter will be thin. -
Bake the Cakes
Divide the batter evenly between the prepared pans. Bake for 30 to 35 minutes or until a toothpick inserted in the center comes out clean. Let cool in pans for 10 minutes, then transfer to a wire rack to cool completely. -
Prepare the Frosting
In a mixing bowl, beat the softened butter until creamy. Gradually add the powdered sugar, heavy cream, and vanilla extract. Continue mixing until smooth and fluffy. Divide the frosting into two bowls and tint one orange and the other black. -
Assemble the Cake
Place one cake layer on a serving plate. Spread a layer of orange frosting on top. Place the other cake layer on top and frost the entire cake with a thin layer of frosting to create a crumb coat. Chill for 30 minutes. -
Final Frosting Layer
After chilling, apply a second, thicker layer of frosting evenly over the cake, smoothing it out as desired. -
Decorate
Use Halloween-themed sprinkles to decorate the top and sides of the cake. You can also use fondant decorations or edible markers to enhance the spooky look.
Tips for Success
- Room Temperature Ingredients: Ensure that your eggs and milk are at room temperature for a smoother batter.
- Don’t Overmix: When combining the wet and dry ingredients, mix just until combined to keep the cake light and fluffy.
- Use Boiling Water: This step intensifies the chocolate flavor and helps create a moist cake.
- Chill the Cake: A crumb coat followed by chilling helps secure crumbs and make your final frosting layer smooth.
- Test for Doneness: Every oven is different; check your cakes a few minutes early to avoid over-baking.
Easy Variations
- Gluten-Free Option: Substitute all-purpose flour with a gluten-free flour blend.
- Chocolate Variations: Add mini chocolate chips to the batter for added texture and flavor.
- Different Frosting Flavors: Try adding peppermint extract to the frosting for a seasonal twist.
- Layer Cake: Stack more than two layers—use a third cake layer for a taller cake.
- Different Colors: Use different food coloring for a vibrant cake to match your theme, such as purple or green.
What to Serve with Halloweentown Cake
- Ice Cream: Vanilla or pumpkin-flavored ice cream pairs wonderfully with chocolate cake.
- Hot Cocoa: A warm cup of hot cocoa enhances the comfort of this dessert.
- Fruit Salad: A side of fresh fruit salad can balance the sweetness of the cake.
- Spooky Cupcakes: Serve alongside themed cupcakes to complete the Halloween atmosphere.
- Pumpkin Pie: For a classic fall experience, pair the cake with slices of pumpkin pie.
Storage and Reheating
- Refrigerator Storage: Store leftover cake in an airtight container in the refrigerator for up to 4 days.
- Freezer Storage: You can freeze the cake layers (wrapped tightly) for up to 3 months. Thaw in the refrigerator before frosting.
- Reheating Method: Heat individual slices in the microwave for 10 to 15 seconds, ensuring not to overheat to maintain texture.
- Texture Preservation: To keep the frosting from getting too firm, consider letting it sit at room temperature for a few minutes before serving.
Common Mistakes to Avoid
- Skipping the Cooling Step: Frosting a warm cake can lead to melting frosting and a messy appearance.
- Not Measuring Ingredients Accurately: Baking is precise; a kitchen scale can help ensure your measurements are correct.
- Frosting Too Soon: Allow cakes to cool completely to avoid melting your frosting.
- Overcooking the Cake: Check for doneness a few minutes early and be aware of your oven’s idiosyncrasies.
- Neglecting to Grease Pans: Always properly prepare your baking pans to avoid sticking.
Halloweentown Cake: Background & Cultural Inspiration
The Halloweentown cake draws inspiration from the rich cultural traditions and folklore surrounding Halloween. Originating from ancient Celtic harvest festivals, Halloween has evolved into a holiday characterized by celebration, community, and creativity. The concept of Halloweentown evokes images of whimsical magic and fantasy, as seen in films and literature. This cake embodies the spirit of fun and festivity, allowing families to gather and create delicious memories together during the season of spooks and scares.
Frequently Asked Questions
Can I make the cake a day in advance?
Yes, you can make the cake a day ahead. Just store it in an airtight container in the refrigerator.
What can I substitute for whole milk?
You can use almond milk or any other milk alternative based on your preference.
How can I prevent the cake from sticking to the pans?
Make sure to grease and flour your pans well, or use parchment paper at the bottom of each pan.
Can I use a different frosting type?
Absolutely! You can use cream cheese frosting or a whipped cream topping for a lighter option.
What’s the best way to decorate the cake?
Let your creativity shine! Use sprinkles, edible glitter, or fondant to create a spooky scene on top of the cake.
Final Thoughts
The Halloweentown cake is not only a centerpiece for your Halloween festivities but also an enjoyable baking experience. Its minimalist style and adaptability make it a canvas for your creativity. Whether you’re celebrating with friends, family, or just looking to indulge in a festive treat, this cake deserves a spot in your recipe collection. Happy baking, and may your Halloween celebrations be sweet and spooky!
PrintHalloweentown Cake
A delightful minimalist Halloween cake that’s fun to create and beautiful to display, perfect for spooky celebrations.
- Prep Time: 20
- Cook Time: 30
- Total Time: 50
- Yield: 8 servings
- Category: Dessert
- Method: Baking
- Cuisine: American
- Diet: Vegetarian
Ingredients
- 2 cups all-purpose flour
- 1 ½ cups granulated sugar
- 1 cup unsweetened cocoa powder
- 1 ½ teaspoons baking powder
- 1 teaspoon baking soda
- ½ teaspoon salt
- 2 large eggs
- 1 cup whole milk
- ½ cup vegetable oil
- 2 teaspoons vanilla extract
- 1 cup boiling water
- 1 cup unsalted butter, softened
- 4 cups powdered sugar
- ¼ cup heavy cream
- 1 teaspoon vanilla extract
- Food coloring (orange and black)
- Halloween-themed sprinkles
- Fondant decorations or edible markers (optional)
Instructions
- Preheat your oven to 350°F (175°C). Grease and flour two 9-inch round cake pans.
- Mix the dry ingredients in a large bowl until well combined.
- Add the eggs, milk, vegetable oil, and vanilla extract to the dry ingredients. Mix on medium speed until well blended.
- Incorporate the boiling water into the batter and mix until smooth.
- Bake the cakes in the prepared pans for 30 to 35 minutes, or until a toothpick comes out clean. Cool in pans for 10 minutes before transferring to a wire rack.
- Prepare the frosting by beating the softened butter until creamy, then adding powdered sugar, heavy cream, and vanilla extract until smooth.
- Assemble the cake by placing one cake layer on a serving plate, frosting with orange frosting, and adding the second layer on top.
- Frost the entire cake with a crumb coat and chill for 30 minutes.
- Apply a second, thicker layer of frosting over the chilled cake.
- Decorate the cake with Halloween-themed sprinkles and fondant decorations as desired.
Notes
Ensure room temperature ingredients for a smoother batter and avoid overmixing to keep the cake fluffy.